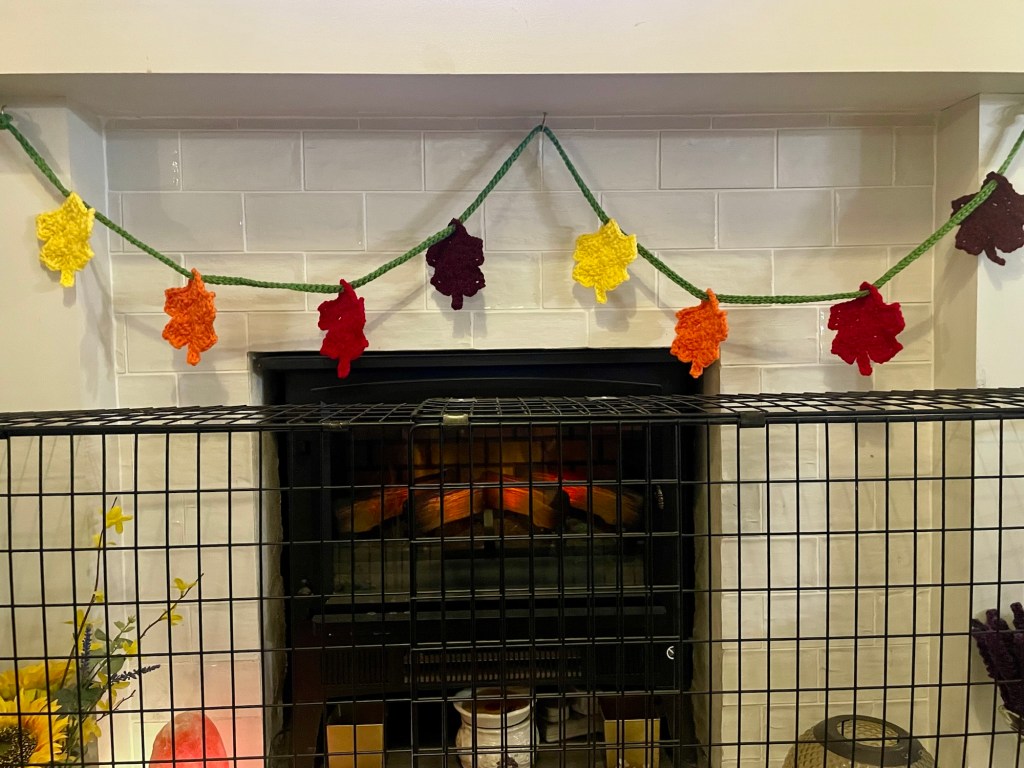
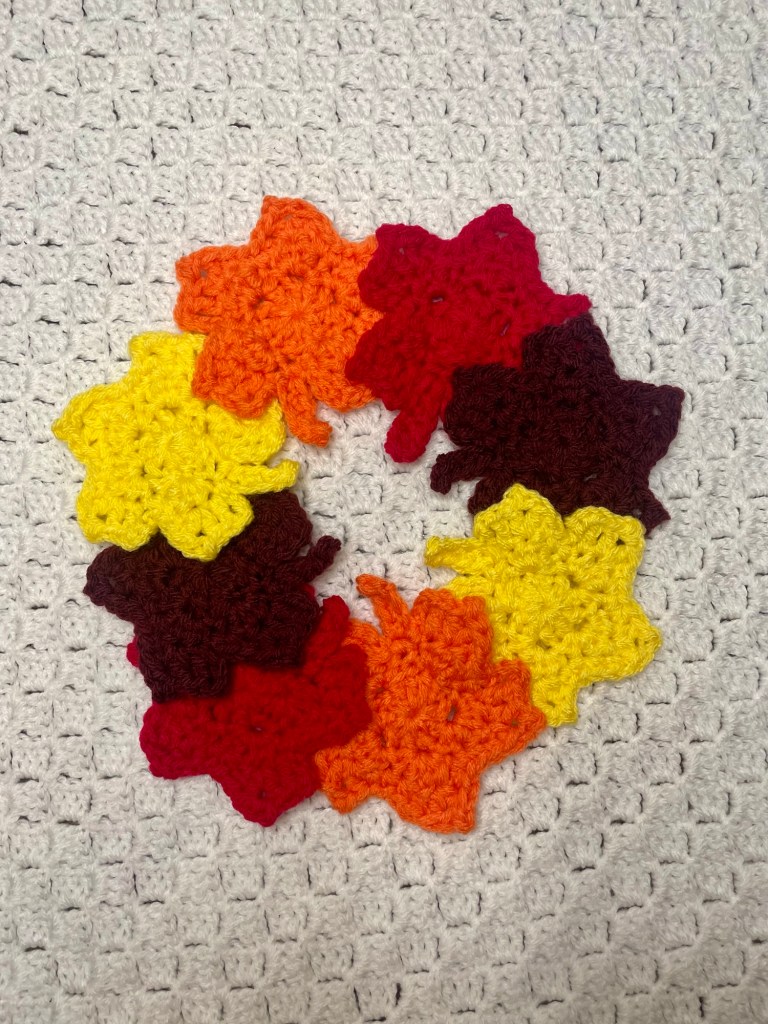
Blog

Chunky Pixie Hat Free Crochet Pattern (3-24m)

Now that the weather has started to cool down, I knew I wanted to make some cute pixie hats for my children to wear, and some to sell at market. I love these hats, especially for babies and toddlers because they are not as easy for them to get off and don’t fall off as easily as beanies, so I knew those little ears would be kept toasty and warm.

To make your own you will need about 50g of chunky yarn, I used Stylecraft Special Chunky, a 8mm crochet hook, some scissors, a 20mm button and a yarn needle. A fluffy pom pom is optional but adorable.

I crochet quite tightly so you may need to play around with hook sizes to get the required hat size. My finished hat is 6.5” wide and 7.5” tall which means you need a starting rectangle of around 14” x 6.5”.

Chunky Pixie Hat (3-24m)

Main:

  • 1. ch35, dc in 3rd ch from hook and across (33)
  • 2-9. ch2, turn, dc in st at base of ch and across (33)
  • 10. fold in half lengthwise with right sides together, to make a bonnet shape, slip stitch the back long seam together then bind off and turn the seam to the inside of the hat
  • 11. with right side facing, join yarn in the first chain of the first row, ch1, sc in same st, sc2tog, *sc in next st, sc2tog*, repeat from *-* around to last st, bind off and weave in ends (22)

Neck:

  • 1. with wrong side facing and top of hat pointing down, rejoin yarn in bottom corner st (first stitch of row 11), ch1, sc in st at base of ch and next st, sc in the end of the next 18 dc rows, sc in last 2sts (22)
  • 2-3. ch1, turn, sc in st at base of ch and across (22)
  • 4. ch1, do not turn, hdc in st at base of ch, ch1, hdc in same st
  • 5-8. ch1, turn, (hdc, ch1, hdc) in previous rows chsp
  • 9. ch1, sc in st at base of ch, sc in chsp, sc in last st, bind off
  • 10. securely attach a button to the other side of the neck and weave in all your ends

I hope you enjoy this free pattern. I would love to see if you make one so please feel free to share your pictures in my Facebook group, or tag me on social media (@adeleuyancrochet) so I can see.

Crochet Pumpkin (Free Pattern)

Is there anything more autumn than a cute little crochet pumpkin.

I am really enjoying the colder weather after all the heatwaves we’ve had this summer and looking forward to all of the cosy autumn and winter crochet! With that in mind, I decided to make a pumpkin for our house and I love it!

To make your own crochet pumpkin, you will need double knit yarn, a 6mm crochet hook, a pair of scissors, some stuffing, a cinnamon stick and a yarn needle. The pumpkin is approximately 4” wide and 3″ tall. The pattern is written using American terminology and is suitable for beginners.

Crochet Pumpkin (Free Pattern)

  • 1. with 6mm hook and two strands of double knit yarn held together, ch16, sc in 2nd ch from hook and each st across to end
  • 2-30. ch1, turn, working in back loops only, sc in st at base of ch and each st across to end (15)
  • 31. ch1, turn, fold in half to form a tube, then slst both short edges together to join
  • 32. bind off, leaving a long tail then gather the bottom edge, using your hook or a yarn needle, knot and weave in ends then turn right sides out
  • 33. fill with stuffing, then attach a long tail of yarn to the top and gather the top edge, adding the cinnamon stick into the stuffing before tightly closing off, bind off and weave in ends

I hope you enjoy this free pattern. I would love to see if you make one so please feel free to share your pictures in my Facebook group, or tag me on social media (@adeleuyancrochet) so I can see.

Baby V-Neck Cardigan

The baby v-neck cardigan is perfect for when you need a quick and easy crochet project. It keeps my baby nice and cosy as the summer closes out and autumn draws in. I especially love how I can make one of these cardigans in just a few hours. The pattern includes directions for newborn, 0-6months and 6-12months.

I used two strands of double knit yarn held together throughout to make a nice thick and quick to make cardigan. Perfect for if you need to whip up a quick gift for someone or for if you don’t have long to spend crocheting. The pattern is beginner friendly, uses American terminology and features the double crochet stitch.

To make your own, you will need 5mm, 6mm and 7mm crochet hooks, double knit (light worsted) yarn, a tape measure, scissors, a yarn needle and 3 x 15-20mm buttons.

You can find the Baby V-Neck Cardigan crochet pattern in my Etsy shop, along with all of my other PDF patterns and items I have ready made for sale.

Feel free to join us in my Facebook group to see more pictures, get feedback and ask any questions you may have.

Processing…
Success! You're on the list.

Christmas Crochet Countdown Day 7: Crochet Christmas Stocking

This stocking was a quick gift each for my boys, and I got to fill it with more small gifts aswell!

To make your own, you will need a 9mm crochet hook, red and white chunky yarn, scissors and a yarn needle.

Christmas Stocking (Free Crochet Pattern)

With a 9mm hook and two strands of white chunky yarn held together –

  • 1. Make a magic loop, ch1, work 10hdcs in loop, join with slst in top of 1st hdc (10)
  • 2. Ch1, turn, work 2hdcs in st at base of ch and each st around, join with slst in top of 1st hdc (20)
  • 3. Ch1, turn, hdc in st at base of ch and each st around, join with slst in top of 1st hdc (20)
  • 4. Change to two strands of red yarn, ch1, turn, hdc in st at base of ch and each st around, join with slst in top of 1st hdc (20)
  • 5-8. Ch1, turn, hdc in st at base of ch and each st around, join with slst in top of 1st hdc (20)
  • 9. Ch1, turn, hdc in st at base of ch and each st around, join with slst in top of 1st hdc, bind off (20)
  • 10. With wrong side of work facing, rejoin two strands of white yarn in the 5th stitch from the bind off stitch, not including the stitch at the base of the bind off stitch, ch1, hdc in st at base of ch and in next 4sts, skip stitch at the base of the bind off stitch, hdc in next 6sts (11)
  • 11-13. Ch1, turn, hdc in st at base of ch and each st across (11)
  • 14. Fold right sides of heel together then slip stitch the back opening shut, bind off and weave in ends
  • 15. With wrong side of work facing, rejoin two strands of red yarn in the middle of the heel, ch1, hdc in st at base of ch and evenly around, join with slst in top of 1st hdc (20)
  • 16-24. Ch1, turn, hdc in st at base of ch and each st around, join with slst in top of 1st hdc (20)
  • 25. Change to two strands of white yarn, ch1, turn, hdc in st at base of ch and each st around, join with slst in top of 1st hdc (20)
  • 26-27. Ch2, turn, dc in st at base of ch and each st around, join with slst in top of 1st dc (20)
  • 28. Ch1, turn, sc in st at base of ch, ch3, slst in 3rd ch from hook, *sc in next 2sts on the stocking edge, ch3, slst in 3rd ch from hook*, repeat from *-* around to last st, sc in last st, join with slst in top of 1st sc, bind off and weave in ends
  • 29. Add a chain stitch hanging loop then stuff with gifts!

I hope you enjoy this free Christmas crochet pattern. I would love to see if you make one so please feel free to share your pictures in my Facebook group, or tag me on social media (@adeleuyancrochet) so I can see.

Christmas Crochet Countdown Day 6: Lavender Bookmark

This lavender bookmark works up in only 2 rows and makes a quick and thoughtful gift for the book lovers in your life.

To make your own, you will need a 4mm crochet hook, a small amount of green and lilac yarn, scissors and a yarn needle.

Lavender Bookmark (Free Crochet Pattern)

With a 4mm hook and green yarn –

  • 1. Ch51, slst in 2nd ch from hook and across, bind off and weave in ends (50)
  • 2. Join lilac yarn in 13th st from bind off stitch, *ch3, sc in 3rd ch from hook, skip next stitch on the stem, slst into next st*, repeat from *-* 5 more times up the first edge then 6 more times down the opposite side of the stem, bind off and weave in ends

I hope you enjoy this free Christmas crochet pattern. I would love to see if you make one so please feel free to share your pictures in my Facebook group, or tag me on social media (@adeleuyancrochet) so I can see.

Christmas Crochet Countdown Day 5: Crochet Bauble

This crochet bauble works up really quickly and can be made in any colour to match your decorations. It would also be really cute to make a set to give as a gift.

To make your own you will need a 7mm crochet hook, double knit yarn in two colours of your choice, scissors, a yarn needle and a small amount of toy stuffing. This will make a large bauble that is around 10” circumference.

Crochet Bauble (Free Pattern)

With 7mm hook and two strands of double knit yarn held together –

  • 1. Ch12, sc in 2nd ch from hook and next st, hdc in next 7sts, sc in last 2sts (11)
  • 2-14. Ch1, turn, then work in back loops only, sc in st at base of ch and next st, hdc in next 7sts, sc in last 2sts (11)
  • 15. Fold bauble in half and slip stitch short edges together
  • 16. Ch1, sc2tog around top edge, join with slst to top of 1st stitch then bind off, leaving a long tail (7)
  • 17. Use the tail to gather the remaining stitches together then pull tight to close the opening, secure and weave in ends
  • 18. Stuff the bauble with toy stuffing then reattach the yarn on the open edge, ch1, sc2tog around edge, join with slst to top of 1st stitch then bind off, leaving a long tail (7)
  • 19. Use the tail to gather the remaining stitches together then pull tight to close the opening, secure and weave in ends

I hope you enjoy this free Christmas crochet pattern. I would love to see if you make one so please feel free to share your pictures in my Facebook group, or tag me on social media (@adeleuyancrochet) so I can see.

Christmas Crochet Countdown Day 4: Christmas Placemat

The free pattern for day 4 is this pretty placemat which is perfect for Christmas Day but can be used all year round.

To make your own, you will need a 5mm crochet hook, red, white and green double knit yarn, scissors and a yarn needle.

Christmas Placemat (Free Crochet Pattern)

With a 5mm hook and double knit yarn –

  • 1. with red yarn, make a magic loop, ch2, work 12dcs in loop, join with slst in top of 1st dc, pull centre yarn tail tight to close magic loop (12)
  • 2. change to light green yarn, ch1, turn, sc in st at base of ch, ch1, *sc in next st, ch1*, repeat from *-* across to end, join with slst in top of 1st sc
  • 3. change to white yarn, turn but do not chain, slst into 1st chsp, ch2, work 3dcs in each chsp around, join with slst in top of 1st dc (36)
  • 4. change to dark green yarn, ch1, turn, sc in st at base of ch, ch2, skip next st, *sc in next st, ch2, skip next st*, repeat from *-* across to end, join with slst in top of 1st sc
  • 5. change to red yarn, ch2, turn, work 3dcs in first chsp, ch2, 3dcs in same chsp, ch1, (3dcs in next chsp, ch1) 4 times, work 3dcs in next chsp, ch2, 3dcs in same chsp, ch1, (3dcs in next chsp, ch1) 3 times, work 3dcs in next chsp, ch2, 3dcs in same chsp, (3dcs in next chsp, ch1) 4 times, work 3dcs in next chsp, ch2, 3dcs in same chsp, ch1, (3dcs in next chsp, ch1) 3 times, join with slst in top of 1st dc
  • 6. change to light green yarn, ch1, turn, sc in first chsp, *ch3, sc in next chsp*, repeat from *-* around, ch3, join with slst in top of 1st sc
  • 7. change to white yarn, ch2, turn, work 4dcs in first chsp and each chsp around, join with slst in top of 1st dc (88)
  • 8. change to dark green yarn, ch1, turn, sc in first chsp, *ch4, sc in next chsp*, repeat from *-* around, ch4, join with slst in top of 1st sc
  • 9. change to red yarn, ch2, turn, work 4dcs in first chsp, ch2, 4dcs in same chsp, ch1, (4dcs in next chsp, ch1) 5 times, work 4dcs in next chsp, ch2, 4dcs in same chsp, ch1, (4dcs in next chsp, ch1) 4 times, work 4dcs in next chsp, ch2, 4dcs in same chsp, (4dcs in next chsp, ch1) 5 times, work 4dcs in next chsp, ch2, 4dcs in same chsp, ch1, (4dcs in next chsp, ch1) 4 times, join with slst in top of 1st dc
  • 10. change to light green yarn, ch1, turn, sc in first chsp, *ch4, sc in next chsp*, repeat from *-* around, ch4, join with slst in top of 1st sc
  • 11. change to white yarn, ch2, turn, work 5dcs in first chsp and each chsp around, join with slst in top of 1st dc (130)
  • 12. change to dark green yarn, ch1, turn, sc in first chsp, *ch5, sc in next chsp*, repeat from *-* around, ch5, join with slst in top of 1st sc
  • 13. change to red yarn, ch2, turn, work 5dcs in first chsp, ch2, 5dcs in same chsp, ch1, (5dcs in next chsp, ch1) 7 times, work 5dcs in next chsp, ch2, 5dcs in same chsp, ch1, (5dcs in next chsp, ch1) 4 times, work 5dcs in next chsp, ch2, 5dcs in same chsp, (5dcs in next chsp, ch1) 7 times, work 5dcs in next chsp, ch2, 5dcs in same chsp, ch1, (5dcs in next chsp, ch1) 4 times, join with slst in top of 1st dc
  • 14. change to light green yarn, ch1, turn, sc in first chsp, *ch5, sc in next chsp*, repeat from *-* around, ch5, join with slst in top of 1st sc
  • 15. change to white yarn, ch2, turn, work 6dcs in first chsp and each chsp around, join with slst in top of 1st dc (180)
  • 16. change to dark green yarn, ch1, turn, sc in first chsp, *ch6, sc in next chsp*, repeat from *-* around, ch6, join with slst in top of 1st sc
  • 17. change to red yarn, ch2, turn, work 6dcs in first chsp, ch2, 6dcs in same chsp, ch1, (6dcs in next chsp, ch1) 9 times, work 6dcs in next chsp, ch2, 6dcs in same chsp, ch1, (6dcs in next chsp, ch1) 4 times, work 6dcs in next chsp, ch2, 6dcs in same chsp, (6dcs in next chsp, ch1) 9 times, work 6dcs in next chsp, ch2, 6dcs in same chsp, ch1, (6dcs in next chsp, ch1) 4 times, join with slst in top of 1st dc
  • 18. ch1, turn, skip first chsp then sc in each st around, ignoring the chain spaces, join with slst in top of 1st sc, bind off and weave in ends (204)

I hope you enjoy this free Christmas crochet pattern. I would love to see if you make one so please feel free to share your pictures in my Facebook group, or tag me on social media (@adeleuyancrochet) so I can see.

Christmas Crochet Countdown Day 3: Chunky Double Pom Beanie

A chunky double pom beanie makes an adorable baby gift at any time of the year but especially at Christmas time. This one is sized to fit approximately newborn to 3 months.

To make your own, you will need a 7mm crochet hook, chunky yarn, a tape measure, scissors, a pom pom maker and a yarn needle.

Chunky Double Pom Beanie (Free Crochet Pattern)

With 7mm hook and chunky yarn –

  • 1. make a magic circle, ch2, work 10dcs in loop, join with slst in top of 1st dc, pull centre yarn tail tight to close magic circle (10)
  • 2. (inc row) ch2, turn, work 2dcs in st at base of ch and each st around, join with slst in top of 1st dc (20)
  • 3. (inc row) ch2, turn, work 2dcs in st at base of ch, dc in next st, *2dcs in next st, dc in next st*, repeat from *-* around, join with slst in top of 1st dc (30)
  • 4-9. ch2, turn, work dc in st at base of ch and in each st around, join with slst in top of 1st dc (30)
  • 10. ch2, turn, fpdc around 1st st of previous row, *bpdc around next st of previous row, fpdc around next st of previous row*, repeat from *-* around to end, join with slst in top of 1st fpdc, bind off and weave in ends
  • 11. make two pom poms and attach to the sides of the hat

I hope you enjoy this free Christmas crochet pattern. I would love to see if you make one so please feel free to share your pictures in my Facebook group, or tag me on social media (@adeleuyancrochet) so I can see.

Christmas Crochet Countdown Day 2: Chunky Slipper Socks

I love to make these slipper socks to give as gifts because they work up quickly with the chunky yarn and they are really warm and cosy for winter. I made this green pair for myself and I am really loving wearing them now the temperatures have dropped. To make your own you will need a 6.5mm crochet hook, 7.5mm crochet hook, chunky yarn, scissors and a yarn needle. This size will fit a UK ladies size 7/8.

Chunky Slipper Socks (Free Crochet Pattern)

SLIPPER (make 2)

With 7.5mm hook and chunky yarn –

  • 1. Ch10, 2hdcs in 2nd ch from hook, hdc in next 7sts, 2hdcs in last st, working on opposite side of chain, hdc in next 7sts, join with slst in top of 1st hdc (18)
  • 2. Ch1, turn, hdc in st at base of ch and next 7sts, 2hdcs in next st, hdc in next 8sts, 2hdcs in next st, join with slst in top of 1st hdc (20)
  • 3. Ch1, turn, hdc in st at base of ch, 2hdcs in next st, hdc in next 9sts, 2hdcs in next st, hdc in next 8sts, join with slst in top of 1st hdc (22)
  • 4-8. Ch1, turn, hdc in st at base of ch and around, join with slst in top of 1st hdc (22) 
  • 9. Ch1, turn, hdc in st at base of ch and next 14sts (15)
  • 10-16. Ch1, turn, hdc in st at base of ch and across (15)
  • 17. Fold the back row with right sides together then stitch together with slst to form the back seam, bind off and weave in ends

RIBBING

With 6.5mm hook and chunky yarn –

  • 1. with right side facing, join yarn at back seam, ch2, dc in st at base of chain and evenly around slipper opening, join with slst in top of 1st dc (26)
  • 2. ch2, turn, fpdc around 1st st of previous row, *bpdc around next st of previous row, fpdc around next st of previous row*, repeat from *-* to end, bind off and weave in ends

I hope you enjoy this free Christmas crochet pattern. I would love to see if you make one so please feel free to share your pictures in my Facebook group, or tag me on social media (@adeleuyancrochet) so I can see.

Christmas Crochet Countdown Day 1: Mini Beanie Ornament

It is December and what better way to celebrate than with a Christmas Crochet Countdown! I am planning to share lots of new patterns, ending on Christmas Eve, for you to use to make crocheted Christmas decorations and cute gifts for your family and friends. If you follow me on Facebook or Instagram, you may have seen that our family welcomed a new baby last week. He is very precious and we are all really enjoying spending time with him and so I may miss a few days here and there, but please bear with me.

Today is December 1st and the first pattern I would like to share is for a mini crocheted beanie ornament. I like to use these to decorate my tree but they can be hung anywhere you like. To make your own you will need a 4mm crochet hook, some scrap yarn, a yarn needle, a pom pom maker and some scissors.

Mini Beanie Ornament (Free Crochet Pattern)

  • 1. With a 4mm crochet hook and DK yarn, make a magic loop, ch2, work 10dcs in the loop, join with a slst in the top of the 1st dc, pull the centre tail to tighten and close the loop (10)
  • 2. Ch2, turn, work 2dcs in stitch at base of chain and each stitch around, join with a slst in the top of the 1st dc (20)
  • 3-4. Ch2, turn, work dc in stitch at base of chain and each stitch around, join with a slst in the top of the 1st dc (20)
  • 5-6. Join contrasting colour, ch1, turn, work hdc in stitch at base of chain and each stitch around, join with a slst in the top of the 1st hdc (20)
  • 7. Bind off and weave in all ends
  • 8. Make a little pom pom and attach it to the top of your mini beanie
  • 9. Thread a piece of yarn through the top, behind the pom pom, to create the hanging thread.

I hope you enjoy this free Christmas crochet pattern. I would love to see if you make one so please feel free to share your pictures in my Facebook group, or tag me on social media (@adeleuyancrochet) so I can see.