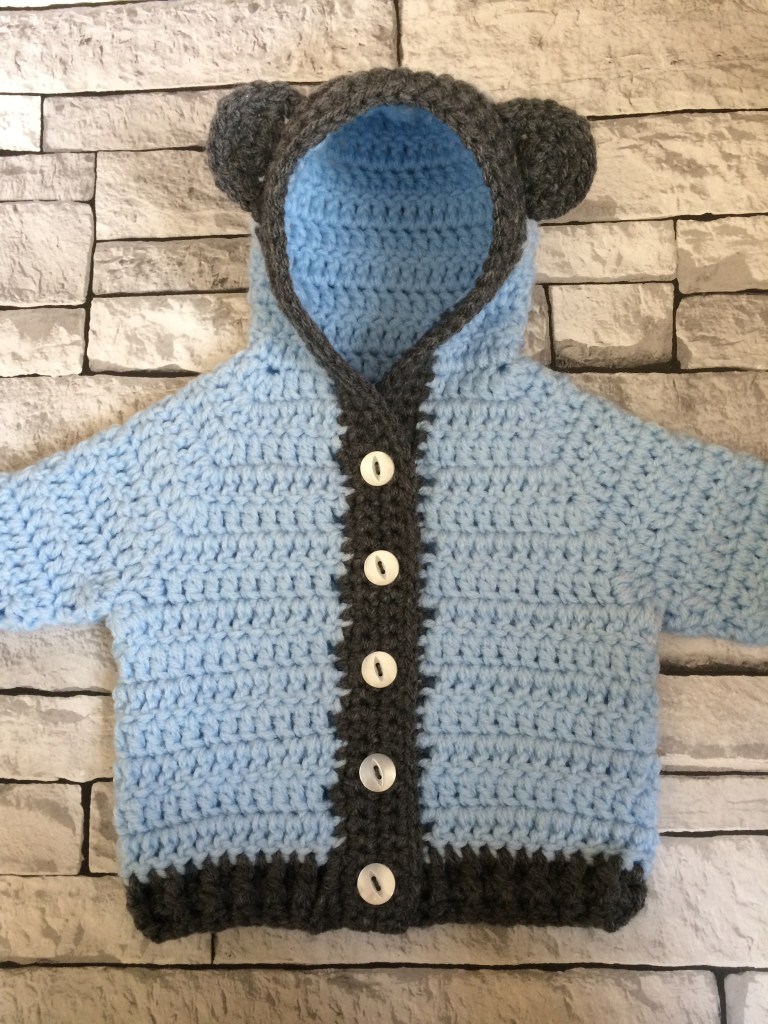
I released my Baby Bear Hoodie pattern a few months ago, and since then I have been working on a toddler version of that pattern. As I am a perfectionist and currently test all of my patterns myself, this has taken me longer than I would care to admit. I have had quite a few requests for larger sizes and I am delighted to now be able to say that I have finally finished the Toddler Bear Hoodie pattern! This pattern is for sizes 1-2y, 2-3y and 3-4y, or from around 20″-22″ chest. The pattern has been made with around 5″ of ease included, to allow for layering. The hoodie can be made without the bear ears, but I think they add an extra touch of cute.
The hoodie is made using two strands of double knit yarn held together throughout, with 5mm and 6mm crochet hooks. The pattern is easy to follow and is suitable for beginners, although basic knowledge of crochet is needed. I have written the pattern using US terminology.
You can find the toddler hoodie pattern in my Etsy shop, alongside my other PDF patterns and a few things I have crocheted and are ready made for sale. The baby sized version of this pattern is available here, and for a combined pattern to fit from newborn to 4 years, click here. Feel free to join us in my Facebook group to see more pictures, get feedback and ask any questions you may have.
Processing…
Success! You're on the list.
Whoops! There was an error and we couldn't process your subscription. Please reload the page and try again.
Autumn is one of my favourite times to be a crocheter. After the drought of summer friendly patterns, autumn usually finds me surrounded by piles of yarn, hats, socks and cardigans. I love changing my yarn colours to the more seasonal reds, oranges, mustards and browns. There is just something about autumn, I can’t explain it, but it is my favourite time of year. It is still warm enough to be bearable but it just feels cosy somehow. I have made a list of my favourite autumn-inspired crochet patterns. Please make sure to head over to the blogs mentioned, to show the designers some love.
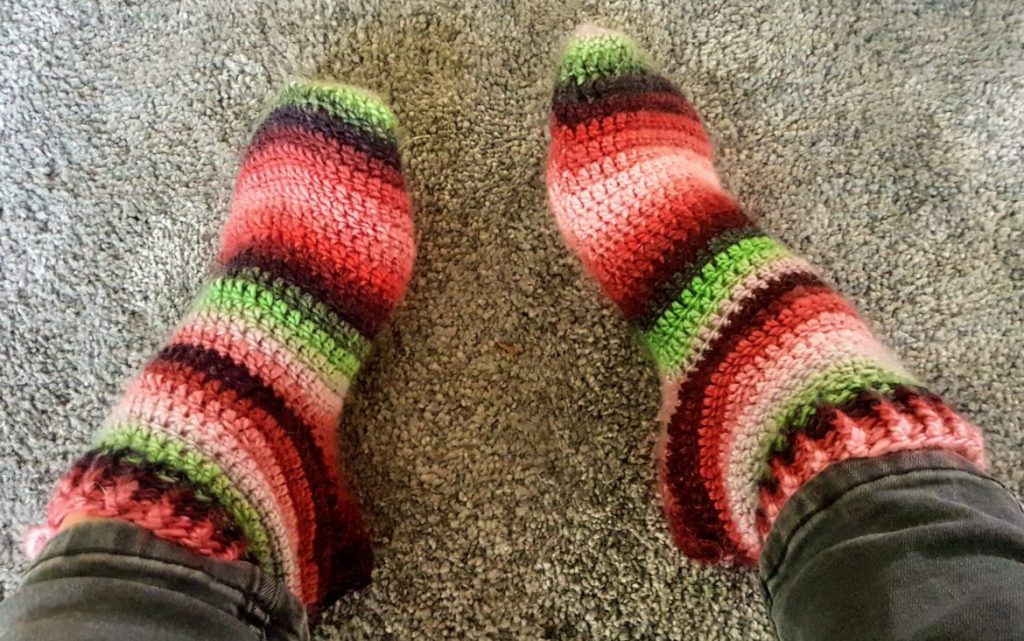
I adore the colours on this scarf, and the stitch is really pretty too! This would make a nice gift for someone, although I don’t think I’d want to give it away.
As soon as the weather starts cooling down, I start looking for cute sweater and cardigan patterns. This one looks nice and easy, and perfect for layering.
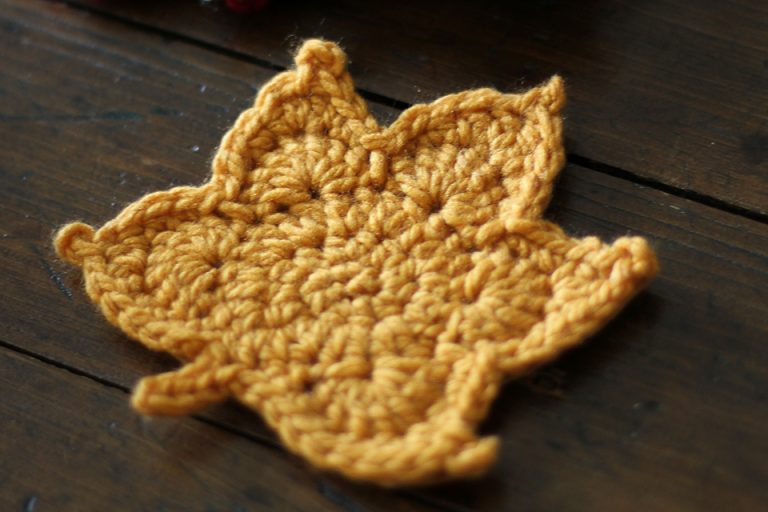
Last but definitely not least, I found this pattern for maple leaf coasters. I think they would love amazing made in lots of different colours.
I hope you have found some inspiration in this post for your next crochet project. If you do make anything linked here, please be sure to tag the original designer on social media, as none of the designs in this post belong to me. Happy crocheting!
Processing…
Success! You're on the list.
Whoops! There was an error and we couldn't process your subscription. Please reload the page and try again.
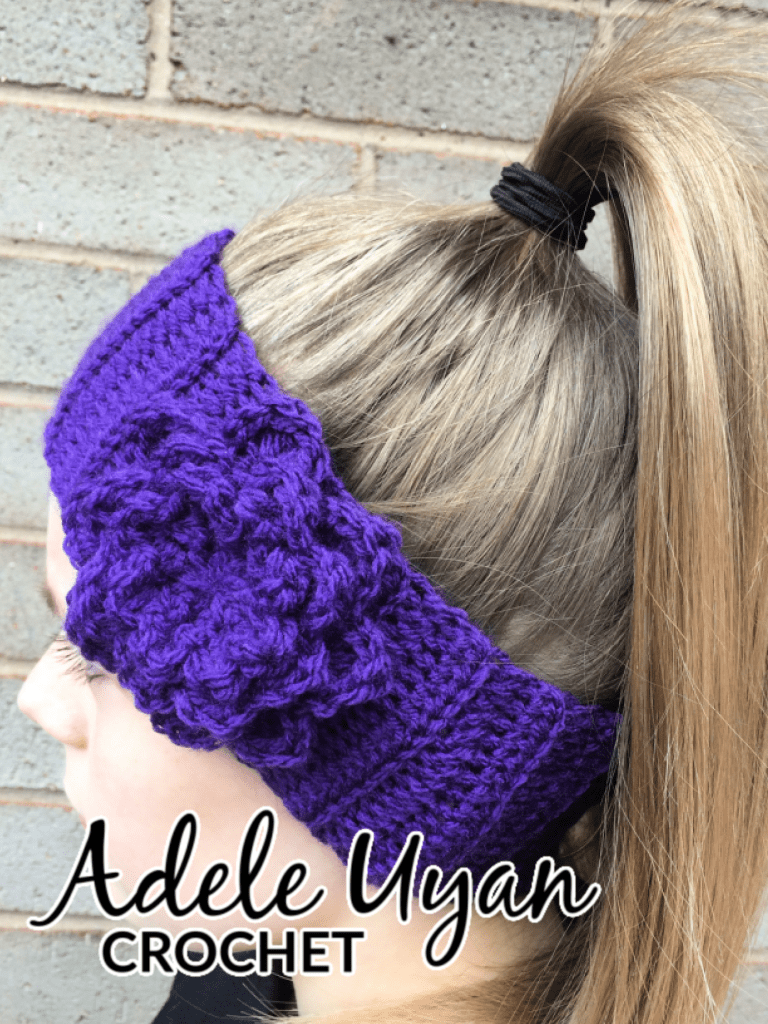
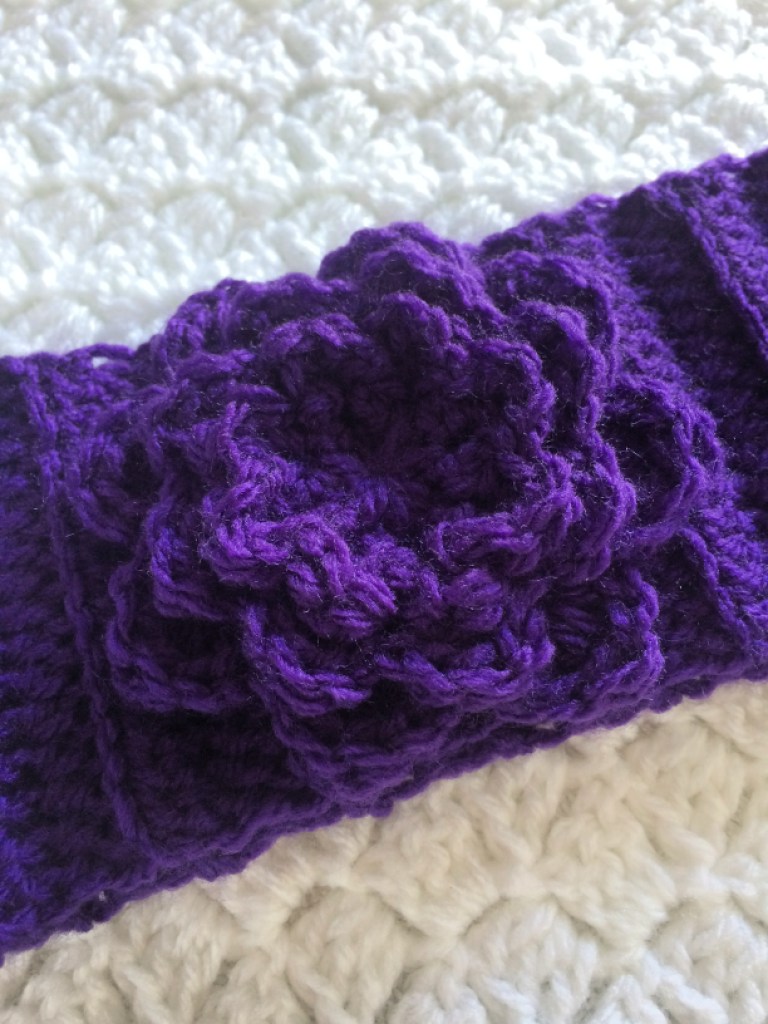
This is another one of those patterns that I have made many of over the years. Headband earwarmers work up really quickly and look very cute. I think the thing I love the most is that they can be worn over a ponytail. That is something I have struggled with in the past, keeping the girls ears warm when they want to wear their hair up. They don’t like wearing a hat over their ponytail and to be fair, it does look pretty uncomfortable so I can see why they wouldn’t like it. This was our compromise. They get their ponytails and I get to cover their ears so I know they are warm ❤
To make your own headband earwarmer, you will need a 5mm crochet hook and double knit yarn in the colour of your choice. I let my girls choose their favourite colours, so I know there will be no fighting over wearing them. You will also need a tape measure, a pair of scissors and a yarn needle.
This pattern should fit an age 6-10 years or up to about a 21″ head. The finished earwarmer should measure approximately 17.25″ in unstretched length and 3.25″ width.
Crochet Headband Earwarmer (Free Pattern)
Main:
1. ch17, hdc in 3rd chain from hook and across (15)
2-41. ch2, working in back loops only, hdc in stitch at base of chain and each stitch across (15)
42. join the two short ends together with slip stitch, to form a tube
43. bind off and weave in all ends
Flower:
1. make a magic loop, ch2, work 16 dcs into loop, join with slst in top of 1st dc, pull centre tail to tighten (16)
2. ch1, do not turn, sc in same st, *ch4, sk 1st, sc in next st*, rep *-* until last st, ch4, join with slst in top of 1st sc
3. ch1, do not turn, *work sc, hdc, dc, trc, dc, hdc, sc, all into one chain space*, rep *-* around, join with a slst in top of 1st sc, bind off
4. rejoin yarn in one of the skipped stitches on round 2, ch1, sc in same st, *ch3, sc in next skipped stitch*, rep from *-* around, ch3, join with slst in top of 1st sc
5. ch1, do not turn, *work sc, hdc, dc, hdc, sc, all into one chain space*, rep *-* around, join with slst in top of 1st sc, bind off
6. make a magic loop, ch1, *sc into loop, ch4*, rep *-* seven more times, join with slst in top of 1st sc
7. ch1, do not turn, *work sc, hdc, dc, hdc, sc, all into one chain space*, rep *-* around, join with a slst in top of 1st sc, bind off
8. using the centre tail of the smaller flower, layer and stitch the small flower on top of the larger flower
9. stitch the flower onto the headband earwarmer and weave in all ends
I hope you find this free pattern useful and make a headband earwarmer of your own. Please let me know if you do make one so I can see your amazing work. You can tag me on social media (@adeleuyancrochet) or better still why not join our Facebook group so we can all see!
Processing…
Success! You're on the list.
Whoops! There was an error and we couldn't process your subscription. Please reload the page and try again.
In my last two Learn to Crochet videos, I taught you which tools you really need to get started in crochet, and how to work a slipknot and chain. In this video, I am going to show you how to work the single crochet stitch. The single crochet stitch is one of the most basic crochet stitches, and one that I use most days, so it is definitely a useful stitch to know.
For this square, I used a 4mm crochet hook and double knit yarn. You can use whichever hook size and yarn you prefer, but please remember that a different sized hook or yarn will give different finished measurements. To start, you will need to make a slipknot and chain 22. To make the single crochet, insert your hook into the second chain from the hook. Catch the yarn and bring it through the chain, which should give you two loops on your hook. Catch the yarn again and bring it through both loops. You have just worked a single crochet.
You can now make a slipknot, chain and work a single crochet. Well done! You’re well on your way to becoming an expert crocheter.
Processing…
Success! You're on the list.
Whoops! There was an error and we couldn't process your subscription. Please reload the page and try again.
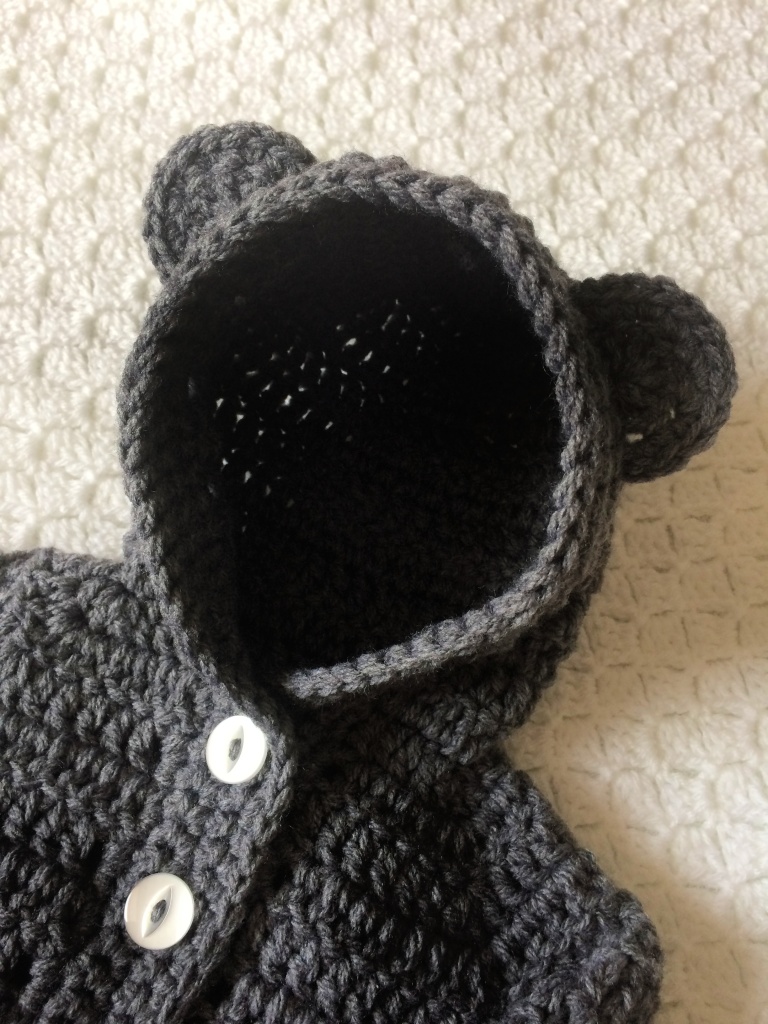
With the weather getting colder, I figured that now is the best time to release my baby hoodie pattern. I have been making these little baby hoodies for as long as I can remember and I finally managed to write my pattern down as a PDF. The pattern is currently available in sizes newborn, 0-6m and 6-12m. More sizes will be released when I have had chance to sit down and write up the PDF for them. I love that this baby hoodie is so cute and cosy. The hoodie can be made without the bear ears, but for me bear ears are always a plus, so they always get added.
The hoodie is made using double knit yarn and two different sized crochet hooks. The pattern is easy to follow and is suitable for beginners, although basic knowledge of crochet is needed. I have written the pattern using US terminology.
You can find the baby hoodie pattern in my Etsy shop, alongside my other PDF patterns and a few things I have crocheted and are ready made for sale. The toddler sized version of this pattern is available here, and for a combined pattern to fit from newborn to 4 years, click here. Feel free to join us in my Facebook group to see more pictures, get feedback and ask any questions you may have.
Processing…
Success! You're on the list.
Whoops! There was an error and we couldn't process your subscription. Please reload the page and try again.
This month I have been doing a lot of admin, so I haven’t had as much time to crochet as I would’ve liked. I still managed to make lots of cute things though, most of which are up for sale in my Etsy shop.
The first thing I made in August were these very cute baby sandals. I made them for a PDF pattern that I was designing. Both the PDF pattern and the finished sandals are available in my Etsy shop.
I also made some baby booties in three different colours, blue, lilac and beige. I love that these baby booties are so cute and gender neutral. The pattern can be found on my blog and the finished booties can be found on my Etsy shop.
I made lots of earsavers, for use with face masks. I love them because face masks leave me with really sore ears. I gave some to family and friends, and listed some in my Etsy shop. The pattern I used is my own, and is on my blog.
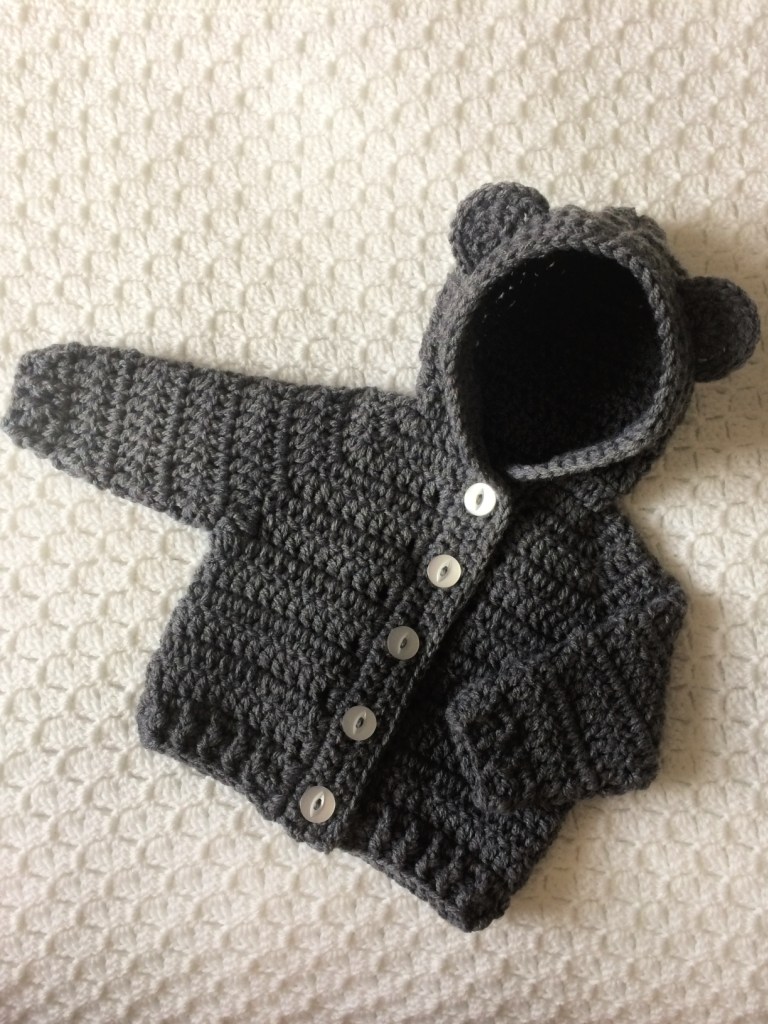
The last things I made in August were varying sizes of baby hoodies, with very cute baby bear ears, for a PDF pattern. The PDF pattern and the finished hoodies can be found in my Etsy shop.
Why not head over to my Facebook group and show us what you have been working on this month. We would love to see it.
Processing…
Success! You're on the list.
Whoops! There was an error and we couldn't process your subscription. Please reload the page and try again.
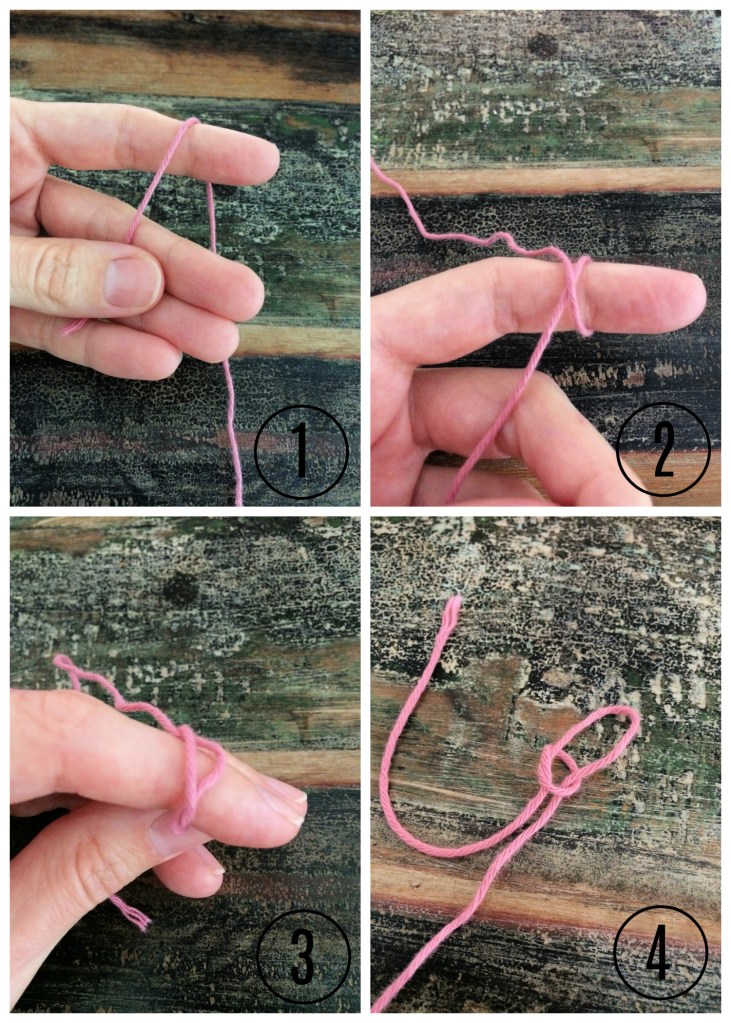
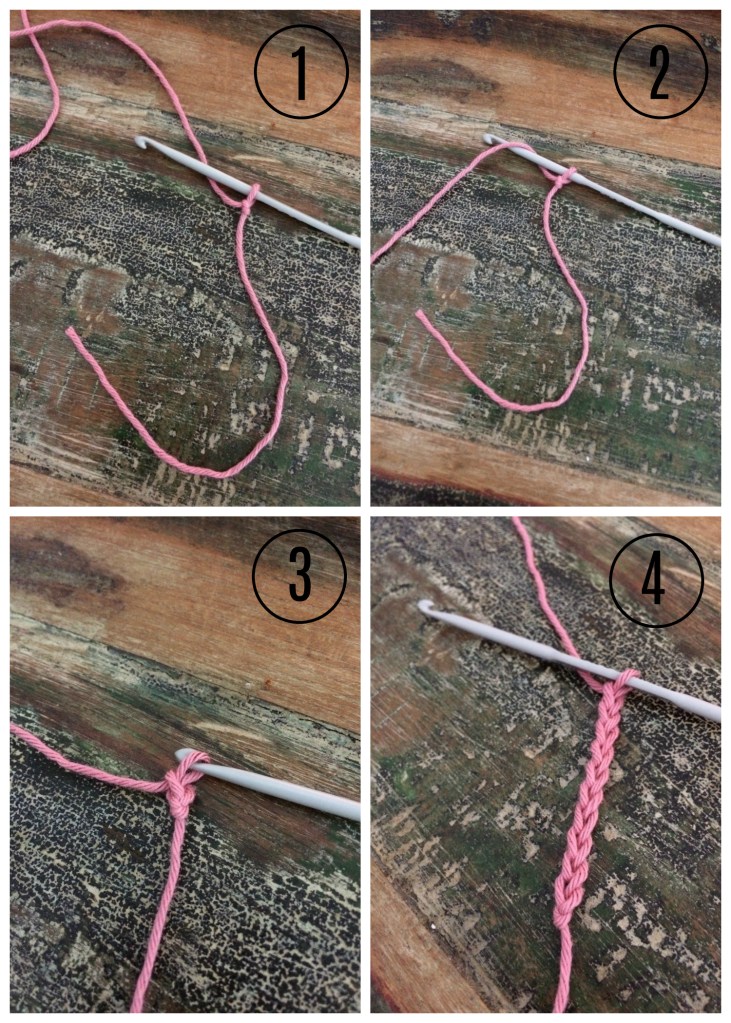
If you are following along with my Learn to Crochet series, you will remember that, in my last post, I told you everything you needed to gather before you could get started with your project. This week, I am going to show you how to start your project. Most crochet projects (except some that are worked in the round) start with a slipknot and a certain amount of chains. The first row of stitches is worked into those chains and whatever you are crocheting grows from there. So you can see why it’s important that you know how to chain before you learn anything else.
I am using a 4mm crochet hook and 100% cotton yarn. We are just going to start by making a slipknot and 10 chains. To make a slipknot, you need to hold the tail end of the yarn in your left hand and the working end of the yarn in your right hand. Wrap the working end of the yarn around your index finger, from front to back and then to the top of your index finger again, to make an x shape. Pull the working end of the yarn underneath and through the loop on your finger, then pull both the tail end and working end of the yarn, whilst still keeping hold of the loop, to tighten the slipknot.
To make your first chain, place the slipknot on to your hook, with the tail end at the back and the working end towards the front. Hold the yarn over your index finger. Pass the hook in front of the yarn, catch the yarn with the hook and pull it through the loop on the hook. Repeat until you have 10 chains on your hook.
Well done! You can now make a slipknot and work the chain stitch. You will be a crochet queen in no time!
Processing…
Success! You're on the list.
Whoops! There was an error and we couldn't process your subscription. Please reload the page and try again.
Summer is a tricky time for crocheters, because most of the crochet things we make are more suited for cold weather. I know I always struggle a lot more with finding things to crochet in summer, so with that in mind, I compiled a list of summer friendly, free crochet patterns for you to choose from. Please go and visit the blogs of the patterns you like and show the designers some love ❤
How perfect would these fruit coasters be for a garden party!
There you go, plenty of inspiration to keep you crocheting until the weather cools down again. I hope you enjoy looking through these cute ideas and planning your next project. Stay safe and happy crocheting!
Processing…
Success! You're on the list.
Whoops! There was an error and we couldn't process your subscription. Please reload the page and try again.
Is there anything cuter than a baby in a baby bear hat? I love how adorable these hats are, especially considering how quick they are to make. This is an easy project so will be perfect for a beginner. The pattern can be used to make a basic beanie aswell, but the bear ears really make the hat for me, so I add them on as many things as possible.
To make your own baby bear hat, you will need a 6mm crochet hook, double knit yarn, a tape measure, a pair of scissors and a yarn needle.
This pattern is for a hat to fit a newborn, with a head circumference of up to 14.5″. At the end of round 3, the hat should measure approximately 4″ in diameter. Please bear in mind that I crochet quite tightly, so you may need to change your hook size to get the right diameter. Use whichever hook you need to get the correct hat size. When you have finished your hat, the length should be around 5.25”. You can add or remove length rows as needed, to get the right size.
Baby Bear Hat (Free Crochet Pattern)
With a 6mm crochet hook and two strands of double knit yarn held together –
1. make a magic loop, ch2, work 12dcs in loop, join with slst in top of 1st dc, pull centre yarn tail tight to close magic loop (12)
2. (inc row) ch2, turn, work 2dcs in st at base of ch and each st around, join with slst in top of 1st dc (24)
3. (inc row) ch2, turn, work 2dcs in st at base of ch, dc in next st, *2dcs in next st, dc in next st*, repeat from – around, join with slst in top of 1st dc (36)
4-8. ch2, turn, work dc in st at base of ch and in each st around, join with slst in top of 1st dc (36)
9. ch1, turn, fpdc around 1st st of previous row, *bpdc around next st of previous row, fpdc around next st of previous row*, repeat from *-* around to end, join with slst in top of 1st fpdc
10. bind off and weave in ends
11. make a magic loop, ch2, work 6dcs in loop, pull centre yarn tail tight to close magic loop (6)
12. ch1, work 2scs in each st across, bind off, leaving a long tail to attach ear to hat (12)
13-14. repeat rows 11-12
15. use the long tail left on the ears to attach them to the hat, I like to attach the ears between the 2nd and 4th rows on the hat
I hope you have enjoyed this free baby bear hat crochet pattern. If you make one, please let me know so I can see your amazing work. You can tag me on social media (@adeleuyancrochet) or why not join our Facebook group to show off your creations.
Processing…
Success! You're on the list.
Whoops! There was an error and we couldn't process your subscription. Please reload the page and try again.
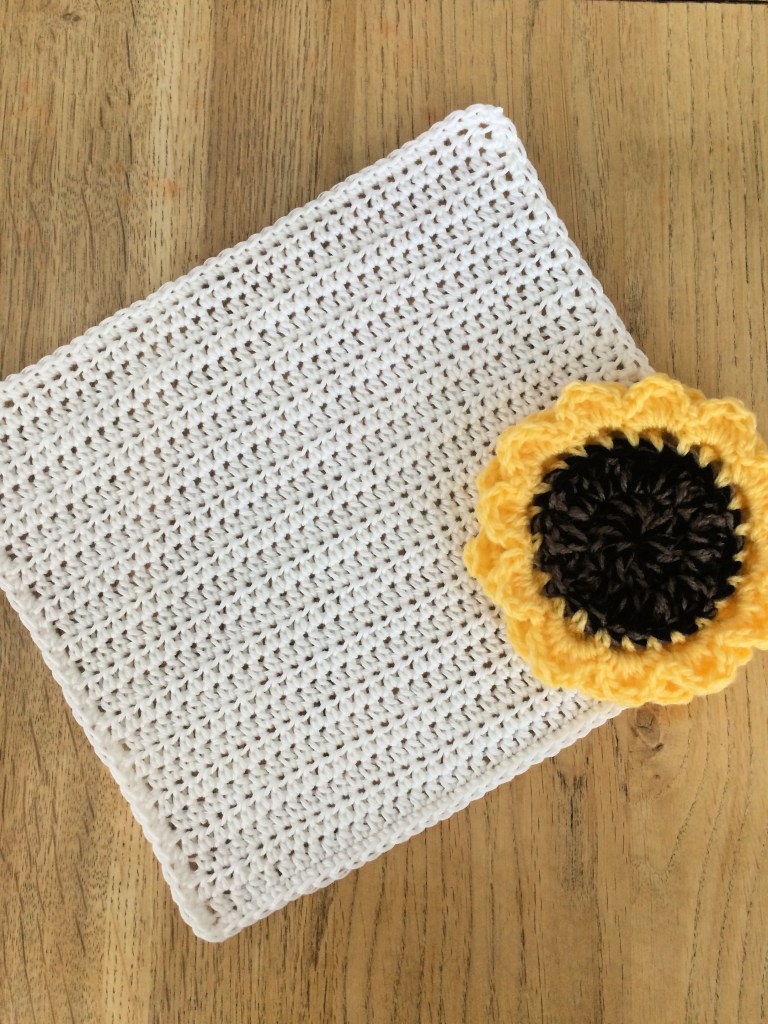
Is there anything more summery than a sunflower? I love how bright they are and how they always turn their faces to the sun. This week, the weather has been less than summery so I decided to bring summer inside instead. I absolutely adore how much this table set brightens up our dining table.
I made placemats, coasters, napkins and napkin holders. The inspiration to make this set actually came from the slippers I made last week. The flower on the front is almost but not quite a sunflower, so I decided I wanted to make an actual sunflower. I made the coaster first, then made lots more coasters to go with it. I was actually planning on leaving it at that but then I thought that a placemat would look lovely, to go with the coaster. While I was making the placemat, I decided to make a napkin holder and finally, I thought I may aswell make a napkin to go with it and complete the set. The final product is a full sunflower table set, for use everyday or for parties.
The coaster, placemat and napkin holder can be made in the yarn of your choice, although I would definitely recommend something washable. Cotton yarn, or another natural yarn, should be used for the napkin, to make it absorbent.
With this pattern, you will learn how to make a sunflower coaster, a sunflower placemat, a cotton napkin and a sunflower napkin holder. The pattern is written using US terminology. Basic knowledge of crochet is assumed, however the pattern is suitable for beginners and instructions are given for some stitches. To make this pattern, you will need a 3.5mm crochet hook, a 5mm crochet hook, 60g brown double knit yarn, 60g black double knit yarn, 50g yellow double knit yarn, 50g white cotton double knit yarn, a pair of scissors and a yarn needle.
This pattern is available in my Etsy store, where you can also find my handmade crochet clothes and accessories. Feel free to join us in my Facebook group to see more pictures, get feedback and ask any questions you may have.
Processing…
Success! You're on the list.
Whoops! There was an error and we couldn't process your subscription. Please reload the page and try again.