Autumn Leaves Falling Down Garland

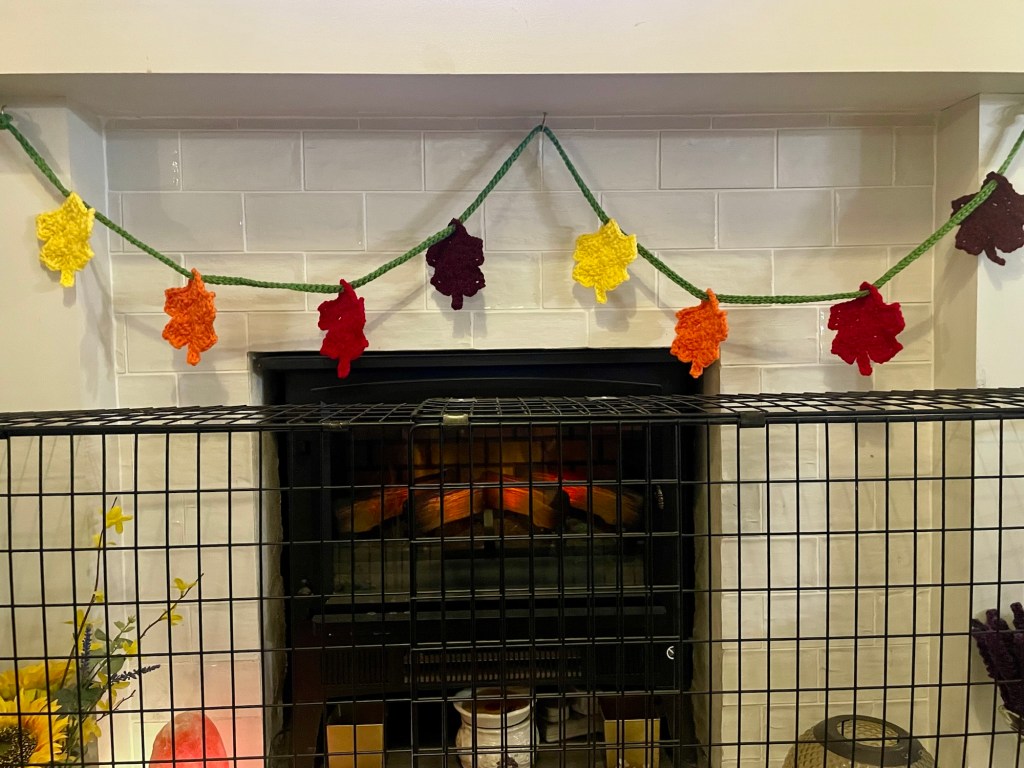
I really love this time of year, autumn is my favourite season and I live for the temperatures cooling down slightly and the leaves changing colour and falling off the trees. With that in mind, I really wanted to make some autumn leaves decor to have in my house. I made some different coloured leaves but wasn’t really sure how to display them in my house. In the end I decided on a little garland to hang them all above my fireplace and I think it looks so cute and cosy now!

To make your own autumn leaf garland, you will need a 6mm crochet hook, double knit or chunky yarn in red, orange, yellow, brown and green, a pair of scissors and a yarn needle. If you are using double knit yarn, use two strands held together. Chunky yarn can be used as a single strand.
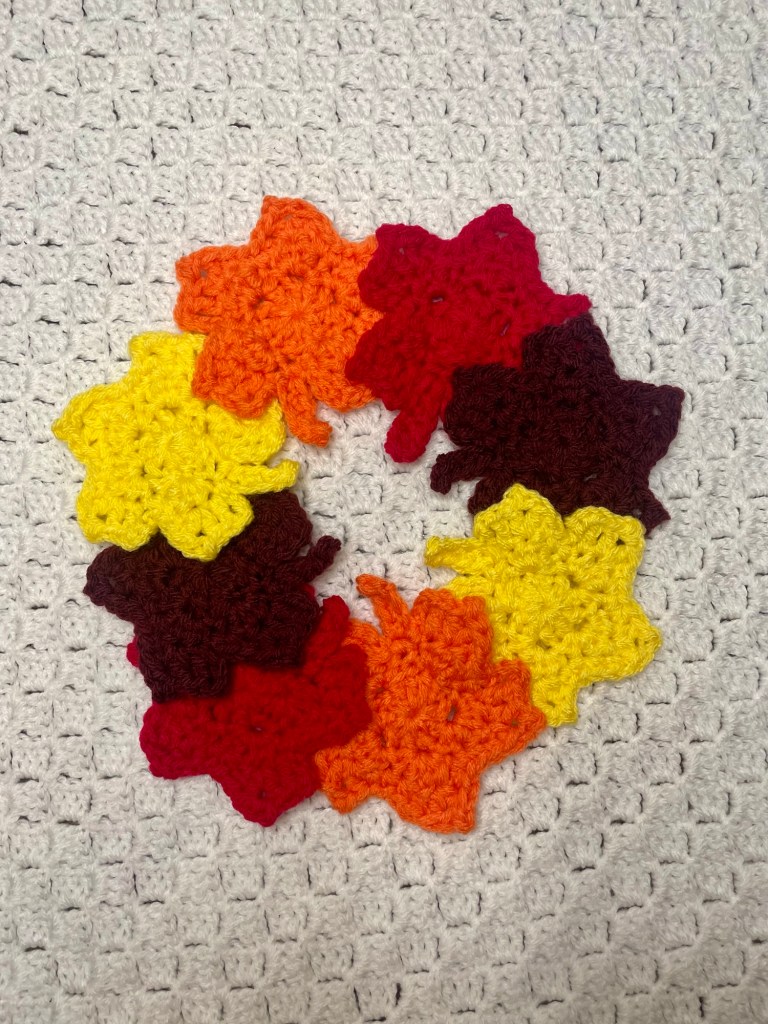
Autumn Leaves Falling Down Garland

Leaves (make 8):

  • 1. Make a magic circle, ch2, work 10dcs in the circle, join with slst in top of 1st dc, pull centre tail to close the circle (10)
  • 2. Ch1, turn, *(sc, hdc, dc, hdc, sc) in next st, skip next st*, repeat from *-* four more times, join with slst in top of 1st sc
  • 3. Ch1, turn, skip st at base of ch, slst into next st, ch4, dc in next st, (dc, ch2, slst in 2nd ch from hook, dc) in next st, sc in next 3sts, ch4, dc in next st, (dc, ch2, slst in 2nd ch from hook, dc) in next st, sc in next 3sts, hdc in next st, (dc, ch2, slst in 2nd ch from hook, dc) in next st, hdc in next st, sc in next 3sts, (dc, ch2, slst in 2nd ch from hook, dc) in next st, dc in next st, ch4, sc in next 3sts, (dc, ch2, slst in 2nd ch from hook, dc) in next st, dc in next st, ch4, slst into last st
  • 4. Ch7, skip 4 chains, sc in next 3sts, slst into base of leaf, bind off and weave in ends

String:

  • With green yarn, ch250, slst in 2nd ch from hook and across, bind off and weave in ends

Finishing:

  • Thread the string through the leaves and hang your autumn leaves garland!

I hope you enjoy this free pattern. I would love to see if you make one so please feel free to share your pictures in my Facebook group, or tag me on social media (@adeleuyancrochet) so I can see.

Crochet Pumpkin (Free Pattern)

Is there anything more autumn than a cute little crochet pumpkin.

I am really enjoying the colder weather after all the heatwaves we’ve had this summer and looking forward to all of the cosy autumn and winter crochet! With that in mind, I decided to make a pumpkin for our house and I love it!

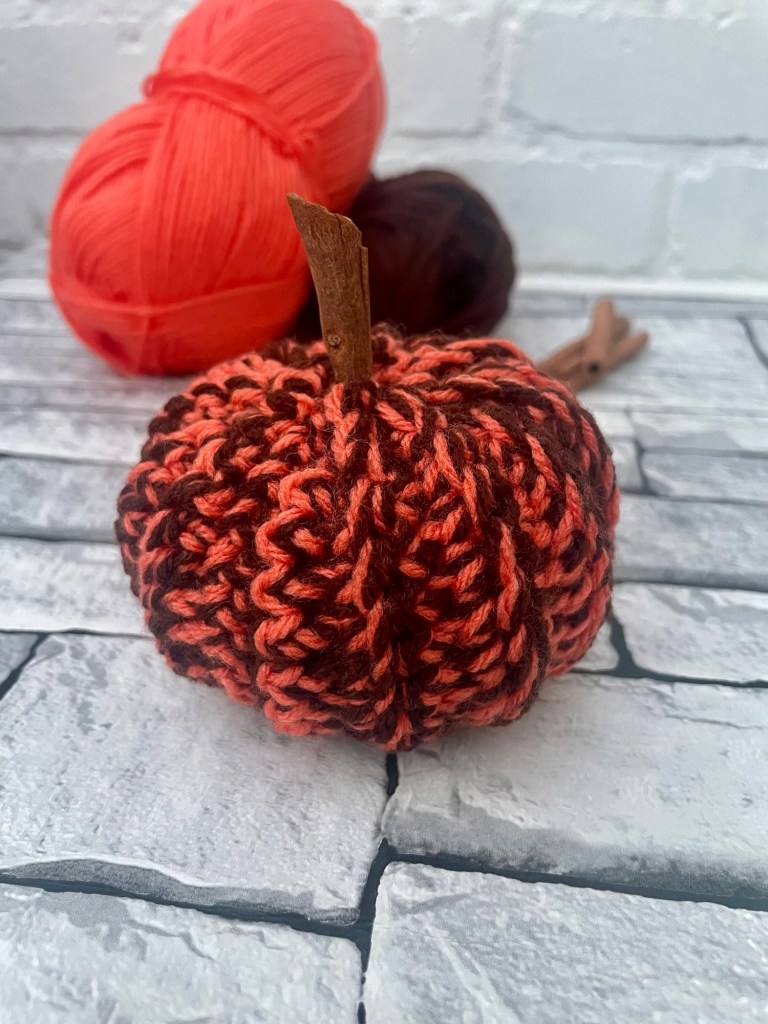
To make your own crochet pumpkin, you will need double knit yarn, a 6mm crochet hook, a pair of scissors, some stuffing, a cinnamon stick and a yarn needle. The pumpkin is approximately 4” wide and 3″ tall. The pattern is written using American terminology and is suitable for beginners.

Crochet Pumpkin (Free Pattern)

  • 1. with 6mm hook and two strands of double knit yarn held together, ch16, sc in 2nd ch from hook and each st across to end
  • 2-30. ch1, turn, working in back loops only, sc in st at base of ch and each st across to end (15)
  • 31. ch1, turn, fold in half to form a tube, then slst both short edges together to join
  • 32. bind off, leaving a long tail then gather the bottom edge, using your hook or a yarn needle, knot and weave in ends then turn right sides out
  • 33. fill with stuffing, then attach a long tail of yarn to the top and gather the top edge, adding the cinnamon stick into the stuffing before tightly closing off, bind off and weave in ends

I hope you enjoy this free pattern. I would love to see if you make one so please feel free to share your pictures in my Facebook group, or tag me on social media (@adeleuyancrochet) so I can see.
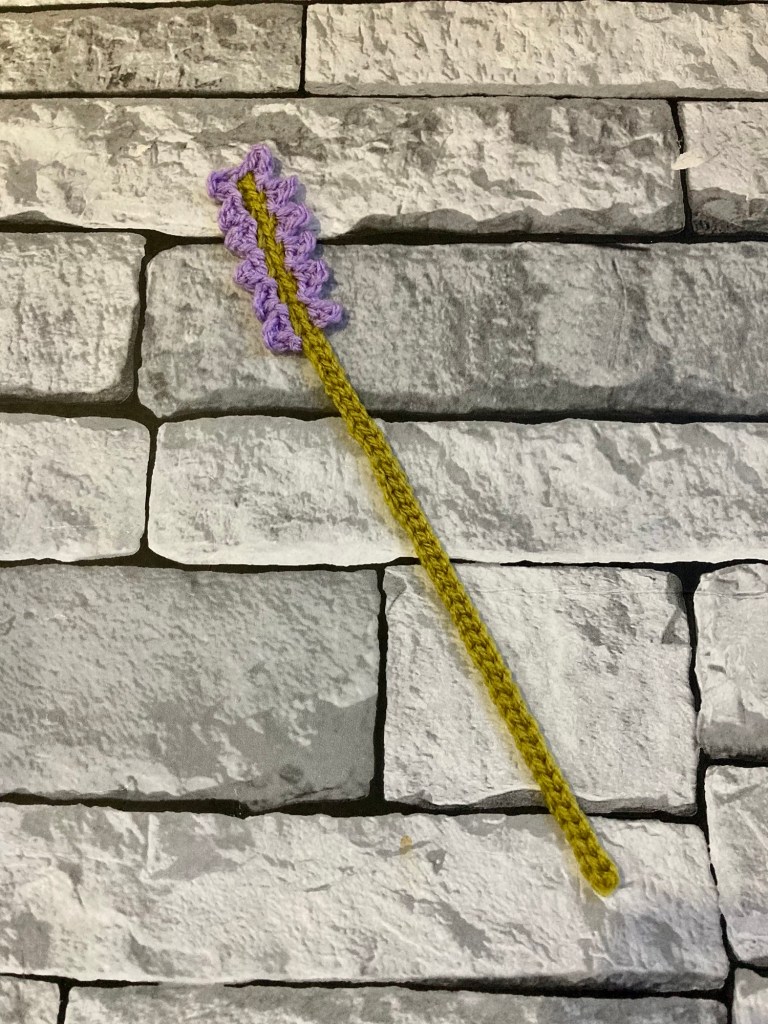
Christmas Crochet Countdown Day 6: Lavender Bookmark

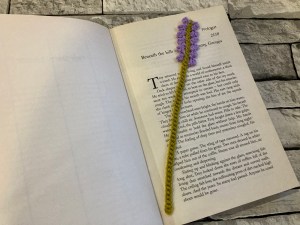
This lavender bookmark works up in only 2 rows and makes a quick and thoughtful gift for the book lovers in your life.

To make your own, you will need a 4mm crochet hook, a small amount of green and lilac yarn, scissors and a yarn needle.

Lavender Bookmark (Free Crochet Pattern)

With a 4mm hook and green yarn –

  • 1. Ch51, slst in 2nd ch from hook and across, bind off and weave in ends (50)
  • 2. Join lilac yarn in 13th st from bind off stitch, *ch3, sc in 3rd ch from hook, skip next stitch on the stem, slst into next st*, repeat from *-* 5 more times up the first edge then 6 more times down the opposite side of the stem, bind off and weave in ends

I hope you enjoy this free Christmas crochet pattern. I would love to see if you make one so please feel free to share your pictures in my Facebook group, or tag me on social media (@adeleuyancrochet) so I can see.

Christmas Crochet Countdown Day 4: Christmas Placemat

The free pattern for day 4 is this pretty placemat which is perfect for Christmas Day but can be used all year round.

To make your own, you will need a 5mm crochet hook, red, white and green double knit yarn, scissors and a yarn needle.

Christmas Placemat (Free Crochet Pattern)

With a 5mm hook and double knit yarn –

  • 1. with red yarn, make a magic loop, ch2, work 12dcs in loop, join with slst in top of 1st dc, pull centre yarn tail tight to close magic loop (12)
  • 2. change to light green yarn, ch1, turn, sc in st at base of ch, ch1, *sc in next st, ch1*, repeat from *-* across to end, join with slst in top of 1st sc
  • 3. change to white yarn, turn but do not chain, slst into 1st chsp, ch2, work 3dcs in each chsp around, join with slst in top of 1st dc (36)
  • 4. change to dark green yarn, ch1, turn, sc in st at base of ch, ch2, skip next st, *sc in next st, ch2, skip next st*, repeat from *-* across to end, join with slst in top of 1st sc
  • 5. change to red yarn, ch2, turn, work 3dcs in first chsp, ch2, 3dcs in same chsp, ch1, (3dcs in next chsp, ch1) 4 times, work 3dcs in next chsp, ch2, 3dcs in same chsp, ch1, (3dcs in next chsp, ch1) 3 times, work 3dcs in next chsp, ch2, 3dcs in same chsp, (3dcs in next chsp, ch1) 4 times, work 3dcs in next chsp, ch2, 3dcs in same chsp, ch1, (3dcs in next chsp, ch1) 3 times, join with slst in top of 1st dc
  • 6. change to light green yarn, ch1, turn, sc in first chsp, *ch3, sc in next chsp*, repeat from *-* around, ch3, join with slst in top of 1st sc
  • 7. change to white yarn, ch2, turn, work 4dcs in first chsp and each chsp around, join with slst in top of 1st dc (88)
  • 8. change to dark green yarn, ch1, turn, sc in first chsp, *ch4, sc in next chsp*, repeat from *-* around, ch4, join with slst in top of 1st sc
  • 9. change to red yarn, ch2, turn, work 4dcs in first chsp, ch2, 4dcs in same chsp, ch1, (4dcs in next chsp, ch1) 5 times, work 4dcs in next chsp, ch2, 4dcs in same chsp, ch1, (4dcs in next chsp, ch1) 4 times, work 4dcs in next chsp, ch2, 4dcs in same chsp, (4dcs in next chsp, ch1) 5 times, work 4dcs in next chsp, ch2, 4dcs in same chsp, ch1, (4dcs in next chsp, ch1) 4 times, join with slst in top of 1st dc
  • 10. change to light green yarn, ch1, turn, sc in first chsp, *ch4, sc in next chsp*, repeat from *-* around, ch4, join with slst in top of 1st sc
  • 11. change to white yarn, ch2, turn, work 5dcs in first chsp and each chsp around, join with slst in top of 1st dc (130)
  • 12. change to dark green yarn, ch1, turn, sc in first chsp, *ch5, sc in next chsp*, repeat from *-* around, ch5, join with slst in top of 1st sc
  • 13. change to red yarn, ch2, turn, work 5dcs in first chsp, ch2, 5dcs in same chsp, ch1, (5dcs in next chsp, ch1) 7 times, work 5dcs in next chsp, ch2, 5dcs in same chsp, ch1, (5dcs in next chsp, ch1) 4 times, work 5dcs in next chsp, ch2, 5dcs in same chsp, (5dcs in next chsp, ch1) 7 times, work 5dcs in next chsp, ch2, 5dcs in same chsp, ch1, (5dcs in next chsp, ch1) 4 times, join with slst in top of 1st dc
  • 14. change to light green yarn, ch1, turn, sc in first chsp, *ch5, sc in next chsp*, repeat from *-* around, ch5, join with slst in top of 1st sc
  • 15. change to white yarn, ch2, turn, work 6dcs in first chsp and each chsp around, join with slst in top of 1st dc (180)
  • 16. change to dark green yarn, ch1, turn, sc in first chsp, *ch6, sc in next chsp*, repeat from *-* around, ch6, join with slst in top of 1st sc
  • 17. change to red yarn, ch2, turn, work 6dcs in first chsp, ch2, 6dcs in same chsp, ch1, (6dcs in next chsp, ch1) 9 times, work 6dcs in next chsp, ch2, 6dcs in same chsp, ch1, (6dcs in next chsp, ch1) 4 times, work 6dcs in next chsp, ch2, 6dcs in same chsp, (6dcs in next chsp, ch1) 9 times, work 6dcs in next chsp, ch2, 6dcs in same chsp, ch1, (6dcs in next chsp, ch1) 4 times, join with slst in top of 1st dc
  • 18. ch1, turn, skip first chsp then sc in each st around, ignoring the chain spaces, join with slst in top of 1st sc, bind off and weave in ends (204)

I hope you enjoy this free Christmas crochet pattern. I would love to see if you make one so please feel free to share your pictures in my Facebook group, or tag me on social media (@adeleuyancrochet) so I can see.

Crochet Plant Holder (Free Pattern)

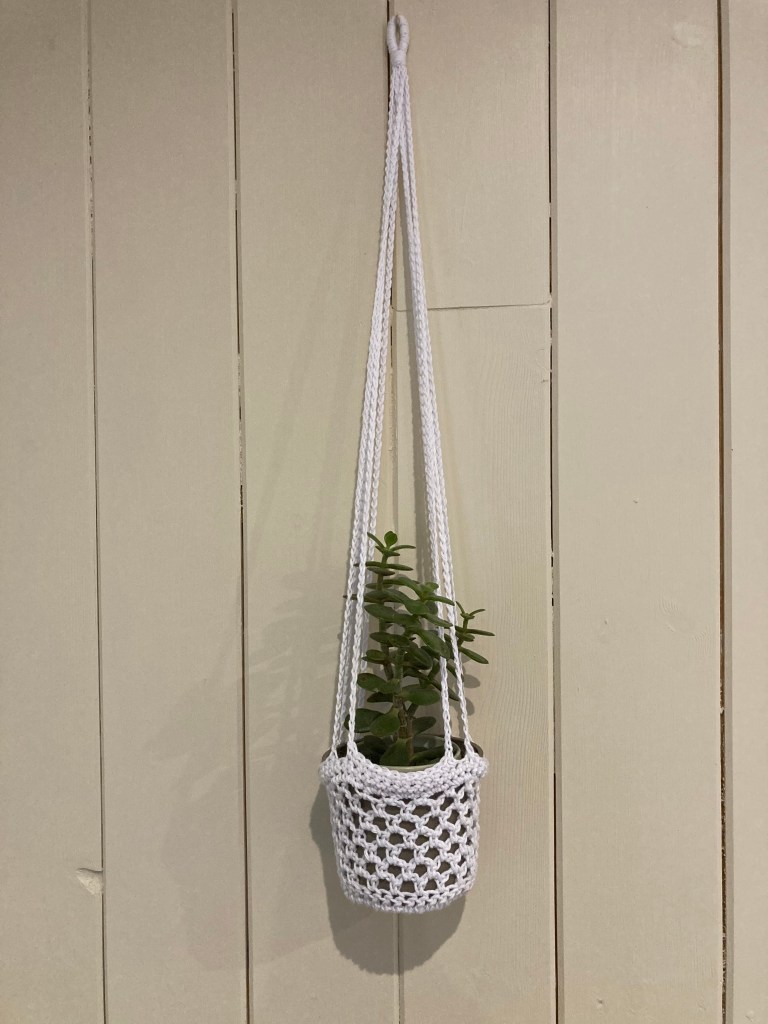
I made this little plant holder out of cotton yarn to brighten up a bare corner of my living room and I love how it turned out. It looks so cute and worked up so quickly. I thought it would make a lovely gift aswell, so after making one for myself, I made a few more for family and friends who love plants as much as me. I think it would look even better with a trailing plant.

This plant holder should fit a 3-4″ pot. The pot I used was 3″ diameter on the bottom, 4″ diameter on the top and 3″ height. I would not recommend using a pot any taller than this without adding more height rows to the pattern, as the plant holder fits this size of pot perfectly.

To make your own plant holder, you will need cotton DK in the colour of your choice, I used white to match my living room, a 4.5mm crochet hook, a tape measure, a stitch marker, scissors and a yarn needle. You can easily make the plant holder bigger by using a bigger hook or thicker yarn, if you need to, or adding more height rows. At the end of round 3, the base of your plant holder should measure the same or just slightly smaller than the base of your pot.

Crochet Plant Holder (Free Pattern)

Base:

1. with cotton DK yarn and a 4.5mm crochet hook, make a magic loop, ch2, work 12dcs in loop, join with slst in top of 1st dc, pull centre yarn tail tight to close magic loop (12)

2. (inc row) ch2, turn, work 2dcs in st at base of ch and each st around, join with slst in top of 1st dc (24)

3. (inc row) ch2, turn, work 2dcs in st at base of ch, dc in next st, *2dcs in next st, dc in next st*, repeat from *-* around, join with slst in top of 1st dc (36)

Sides:

4. ch2, turn, work dc in st at base of ch and in each st around, join with slst in top of 1st dc (36)

5. ch3, do not turn, skip st at base of ch and next st, *sc in next st, ch3, skip 1st*, repeat from *-* around to last 2sts, sc in next st, ch1, join with hdc in same stitch as beginning chains, place stitch marker in top of hdc

6-10. ch3, do not turn, *sc in middle of previous row’s chain space, ch3*, repeat from *-* around to last chain space, sc in middle of last chain space, ch1, join with hdc in same stitch as beginning chains, place stitch marker in top of hdc

11. ch1, do not turn, sc in chain space at base of ch, ch2, *sc in middle of next chain space, ch2*, repeat from *-* around to end, join with slst in top of 1st sc

12. ch1, turn, sc in st at base of ch, *2scs in previous row’s chain space, sc in next st*, repeat from *-* around, 2scs in last chain space, join with slst in top of 1st sc (54)

13. ch1, turn, 2scs in st at base of ch, sc in next 26sts, 2scs in next st, sc in next 26sts, join with slst in top of 1st sc (56)

Handles:

14. ch1, turn, sc in st at base of ch, tightly ch150, skip 1st, sc in next 13sts, tightly ch150, skip 1st, sc in next 13sts, tightly ch150, skip 1st, sc in next 13sts, tightly ch150, skip 1st, sc in next 12sts, join with slst in top of 1st sc

15. bind off and weave in ends

16. arrange the handles in a way that you like then use some spare yarn to wrap them tightly together at the top, I wrapped around for a few inches, then wrapped around underneath aswell to secure the handles and to make a little loop to hang the plant holder up with

17. secure well and weave in ends

I hope you enjoy this free pattern. I would love to see if you make one so please feel free to share your plant holder pictures in my Facebook group, or tag me on social media (@adeleuyancrochet) so I can see.
Processing…
Success! You're on the list.

Sunflower Table Set Crochet Pattern

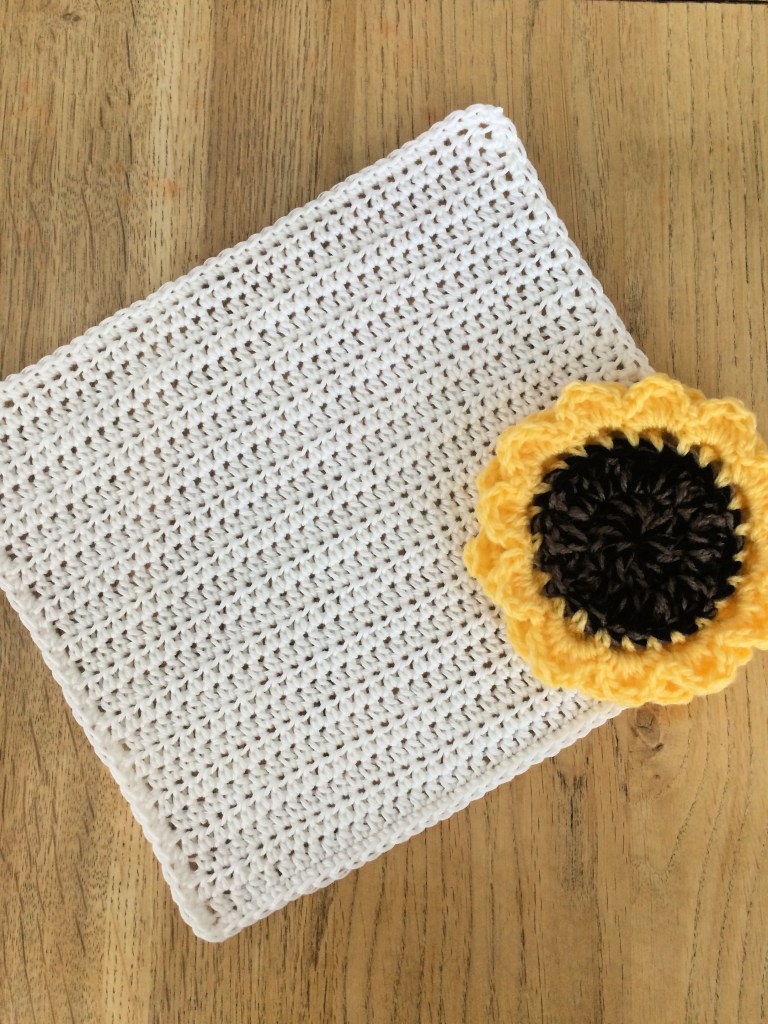
Is there anything more summery than a sunflower? I love how bright they are and how they always turn their faces to the sun. This week, the weather has been less than summery so I decided to bring summer inside instead. I absolutely adore how much this table set brightens up our dining table.

I made placemats, coasters, napkins and napkin holders. The inspiration to make this set actually came from the slippers I made last week. The flower on the front is almost but not quite a sunflower, so I decided I wanted to make an actual sunflower. I made the coaster first, then made lots more coasters to go with it. I was actually planning on leaving it at that but then I thought that a placemat would look lovely, to go with the coaster. While I was making the placemat, I decided to make a napkin holder and finally, I thought I may aswell make a napkin to go with it and complete the set. The final product is a full sunflower table set, for use everyday or for parties.

The coaster, placemat and napkin holder can be made in the yarn of your choice, although I would definitely recommend something washable. Cotton yarn, or another natural yarn, should be used for the napkin, to make it absorbent.

With this pattern, you will learn how to make a sunflower coaster, a sunflower placemat, a cotton napkin and a sunflower napkin holder. The pattern is written using US terminology. Basic knowledge of crochet is assumed, however the pattern is suitable for beginners and instructions are given for some stitches. To make this pattern, you will need a 3.5mm crochet hook, a 5mm crochet hook, 60g brown double knit yarn, 60g black double knit yarn, 50g yellow double knit yarn, 50g white cotton double knit yarn, a pair of scissors and a yarn needle.

This pattern is available in my Etsy store, where you can also find my handmade crochet clothes and accessories. Feel free to join us in my Facebook group to see more pictures, get feedback and ask any questions you may have.

Processing…
Success! You're on the list.

Crochet Hot Pad Potholder (Free Pattern)

This week, I wanted a quick and easy project to make when the children were in bed. I always struggle to know what to crochet in the height of summer, because obviously hats and jumpers are out of the picture, and they are my two most crocheted things! I decided to focus on something for the home and, after a lot of scrolling through Pinterest, I decided I wanted to make a potholder for the middle of our dining table. I looked through lots of designs and originally started on a basic square one. I really did not like the way it was turning out, and decided I wanted something a bit more summery and a bit prettier. I pulled out all of my stitches and started working on a round design. I wanted something a bit more than just a plain circle so I started messing around with adding chain spaces to make the holes in the design. It took me a good few attempts and lots of pulling stitches to get a design that I was happy with, but I really love the way it turned out. It definitely did not end up being a quick and easy project for me, design wise at least, but I made a second one when the pattern was finished, and it made up really easily and very quickly. I love the pop of colour it adds to our neutral tablecloth and this will be used every day! I am also planning on making some to gift to people, in a variety of colours.

To make your own, you will need a 5mm crochet hook, 50g double knit yarn, a pair of scissors and a yarn needle.

Potholder Hot Pad (Free Crochet Pattern)

  1. with a 5mm hook and two strands of double knit yarn held together, make a magic loop, ch2, work 12dcs into the loop, join with slst in top of 1st dc (12)
  2. ch1, turn, sc in st at base of ch, ch1, *sc in next st, ch1*, repeat from *-* across to end, join with slst in top of 1st sc
  3. turn but do not chain, slst into 1st chsp, ch2, work 3dcs in each chsp around, join with slst in top of 1st dc (36)
  4. ch1, turn, sc in st at base of ch, ch2, skip next st, *sc in next st, ch2, skip next st*, repeat from *-* across to end, join with slst in top of 1st sc
  5. turn but do not chain, slst into 1st chsp, ch2, work 3dcs in each chsp around, join with slst in top of 1st dc (54)
  6. ch1, turn, sc in st at base of ch, ch3, skip next 2sts, *sc in next st, ch3, skip next 2sts*, repeat from *-* across to end, join with slst in top of 1st sc
  7. turn but do not chain, slst into 1st chsp, ch2, work 4dcs in each chsp around, join with slst in top of 1st dc (72)
  8. ch1, turn, sc in st at base of ch, ch4, skip next 3sts, *sc in next st, ch4, skip next 3sts*, repeat from *-* across to end, join with slst in top of 1st sc
  9. turn but do not chain, slst into 1st chsp, ch2, work 5dcs in each chsp around, join with slst in top of 1st dc (90)
  10. ch1, turn, sc in st at base of ch, ch3, skip next 2sts, *sc in next st, ch3, skip next 2sts*, repeat from *-* across to end, join with slst in top of 1st sc
  11. ch1, turn, *sc, hdc, dc, hdc, sc* in each chsp around, join with slst in top of 1st sc
  12. bind off and weave in ends

I hope you like this free pattern and make your own summery potholder. Let me know if you do make one, I love to see your work. You can tag me on social media (@adeleuyancrochet) so I can see what you have made, or why not join our Facebook group to show off your creations.Happy crocheting!

Processing…
Success! You're on the list.

Crochet Dishcloth (Free Pattern)

I love making these pretty dishcloths to use when I wash the dishes. They are quite abrasive, due to the pattern, and are very good at removing dirt and grease. They wash well in the washing machine and dry quickly. I love the way that they add a pop of colour to an otherwise dull job. Size small is perfect for me for washing dishes and I like to use size medium for other cleaning jobs.

To make your own, you will need a 5mm hook, a small amount of double knit yarn, a pair of scissors and a yarn needle. This pattern uses American terminology and should be suitable for beginners.

Crochet Dishcloth (Free Pattern)

Small:

  • 1. loosely ch19, 2dcs in 5th st from ch, ch1, 2dcs in same st (shell made), sk1st, *dc in next st, sk1st, 2dcs in next st, ch1, 2dcs in same st, sk1st*, repeat from *-* across to last st, work dc in last st
  • 2. ch3, turn, work shell in previous row’s shell chsp, dc in top of previous row’s dc, end with dc in top of ch3
  • 3-6. repeat row 2 again
  • 7. do not ch or turn, work 4 more dcs in corner st, work alternating dcs and shells across in each hole on way up the side of the cloth until you reach the next corner, work 5dcs in the corner space, continue until you have worked 3 edges, do 4dcs in last corner, join with a sl st in top of ch 3
  • 8. bind off and weave in ends

Medium:

  • 1. loosely ch23, 2dcs in 5th st from ch, ch1, 2dcs in same st (shell made), sk1st, *dc in next st, sk1st, 2dcs in next st, ch1, 2dcs in same st, sk1st*, repeat from *-* across to last st, work dc in last st
  • 2. ch3, turn, work shell in previous row’s shell chsp, dc in top of previous row’s dc, end with dc in top of ch3
  • 3-8. repeat row 2 again
  • 9. do not ch or turn, work 4 more dcs in corner st, work alternating dcs and shells across in each hole on way up the side of the cloth until you reach the next corner, work 5dcs in the corner space, continue until you have worked 3 edges, do 4dcs in last corner, join with a sl st in top of ch 3
  • 10. bind off and weave in ends

    I hope you enjoyed this pattern. I would love to see any dishcloths you make! Feel free to tag me on social media (@adeleuyancrochet) so I can see them. Or why not join our Facebook group to show off your creations. Happy crocheting.

    Processing…
    Success! You're on the list.

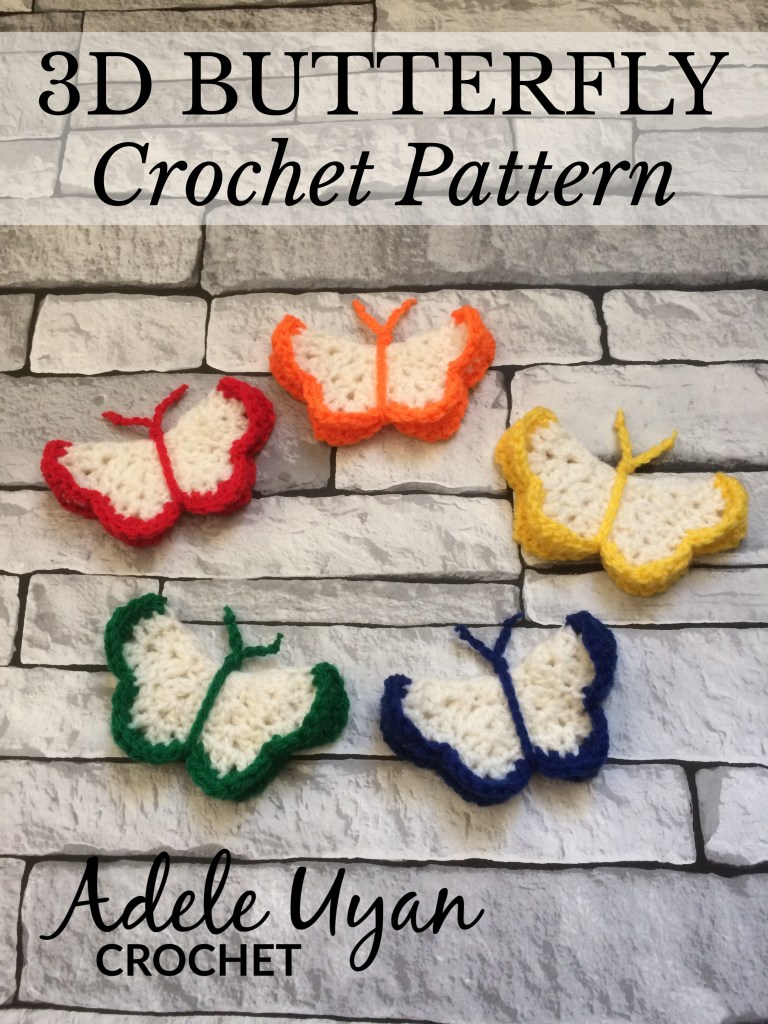
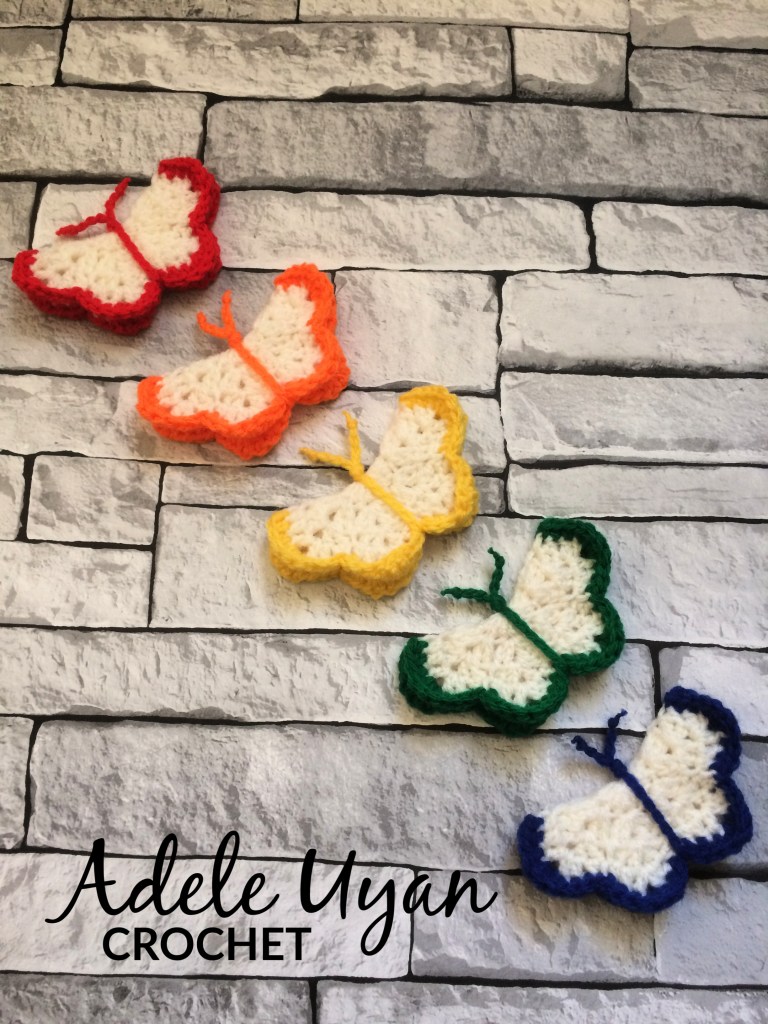
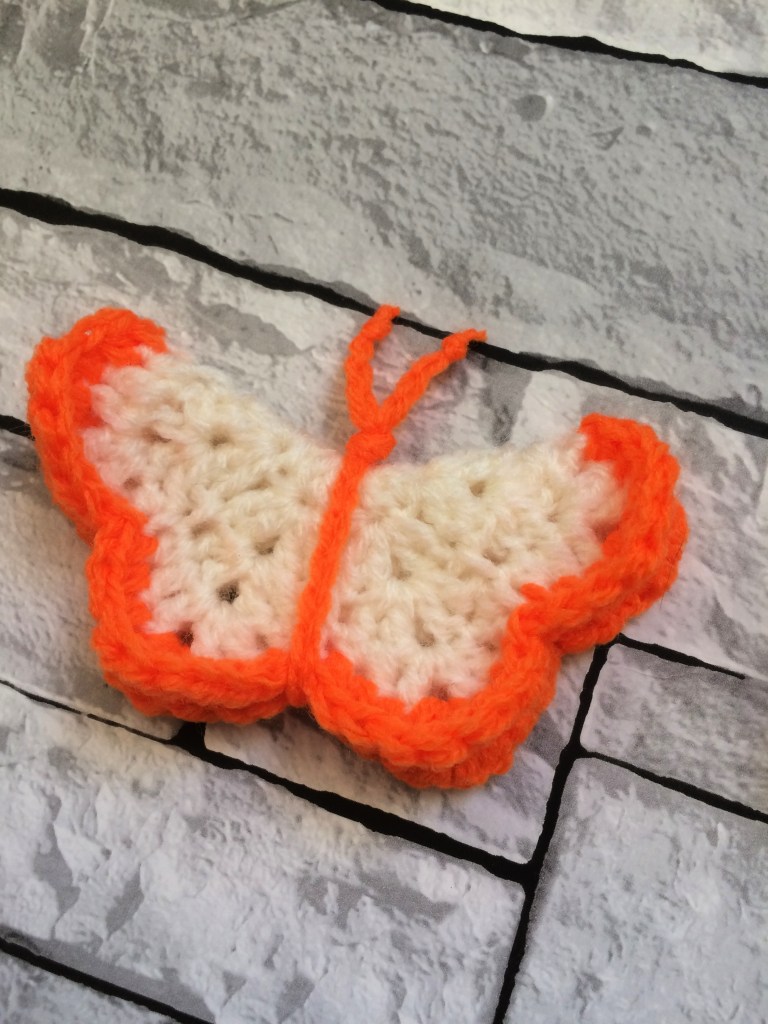
    3D Butterfly (Free Crochet Pattern)

    I first made a little 3D butterfly about 5 years ago, for a yarn bombing project I was taking part in with my local crochet group. We all made lots of flowers and butterflies and decorated a wall in the town centre with them. It looked amazing! I recently tried to follow the pattern that I wrote back then and, as I wasn’t as experienced in pattern writing back then, it seemed unnecessarily complicated. I found myself getting frustrated with the pattern so I decided to update it. This is the updated pattern, easier and quicker to make but the end butterfly is still almost identical.

    If you would like to make your own, you will need a 4mm crochet hook and DK yarns in a main colour and a contrasting colour. You will also need a pair of scissors, a stitch marker and a yarn needle.

    3D Butterfly (Free Crochet Pattern)

    Wings:

    1. with main colour yarn, make a magic loop, ch2, work 16dcs in loop, join with slst in top of 1st dc, pull centre yarn tail tightly to close loop (16)

    2. ch2, do not turn, 2dcs in st at base of ch, ch1, 2dcs in same st, sk1st, *(2dcs, ch1, 2dcs) in next st, sk1st*, repeat from *-* to end, join with slst in top of 1st dc

    3. do not ch or turn, place stitch marker under join st, *2dcs in next chsp, ch1, 2dcs in same chsp, slst inbetween previous row’s shells*, repeat from *-* to end, join with slst in top of 1st dc

    4. ch1, do not turn, hdc in st at base of ch, dc in next st, (dc, ch1, dc) in chsp, dc in next st, hdc in next st, slst in previous row’s slst, *hdc in next st, dc in next st, (dc, ch1, dc) in chsp, dc in next st, hdc in next st, slst in previous row’s slst*, repeat from *-* to end, join with slst in top of 1st hdc

    5. join contrasting colour yarn, ch1, do not turn, *hdc in 3sts, 3dcs in chsp, hdc in 3sts, slst in previous row’s slst*, repeat from *-* to end, join with slst in top of 1st hdc, bind off and weave in ends

    Body:

    1.with contrasting colour yarn, ch36, bind off, fold butterfly in half and wrap body around wings, tie at the top of the wings to secure, tie a knot in the top of each antennae and weave in ends

    I hope you enjoyed making this little 3D crochet butterfly. I would love to see any butterflies you make using this pattern. Feel free to tag me on social media (@adeleuyancrochet) so I can see them! Or why not join our Facebook group to show off your creations. Happy crocheting.

    Processing…
    Success! You're on the list.

    Crochet Bath Set (Free Pattern)

    Don’t you just love giving handmade gifts for Christmas and birthdays. I do! I know how much time and effort goes into making them so I always appreciate handmade gifts. I have made this bath set for several of my family and friends for different occasions over the years. It makes a lovely little gift set if paired with a bottle of bubble bath and a bar of soap.

    This pattern should be suitable for beginners. If you do not yet know how to crochet, you can find a basic how to crochet video here.

    If you would like to make your own, you will need a 6mm crochet hook and DK yarn. You will also need a pair of scissors and a yarn needle.

    Free Crochet Bath Set Pattern

    Bath Puff

    Main:

    1. with two strands DK yarn held together, make a magic ring, ch2, work 10dcs in ring, join with slst in top of 1st dc, do not pull the centre tight (10)
    2. ch2, turn, 3hdcs in each st around, join with slst in top of 1st hdc (30)
    3. ch2, turn, 2dcs in each st around, join with slst in top of 1st dc
    4. repeat rounds 1-3 five more times
    5. weave in outside ends but not magic ring ends

    Tie:

    1. with two strands DK yarn held together, ch60, slst in 2nd ch from hook and across
    2. bind off and weave in ends
    3. fold the tie in half and tie a knot at the bottom to form a loop
    4. loosen magic rings on each piece of bath puff and push the knot through, repeat until all six pieces are on the tie
    5. weave in the magic ring ends, pulling tightly closed around the tie
    6. push the bath puff pieces down firmly and tie a knot at the top, making sure bath puff pieces are still tightly squashed together

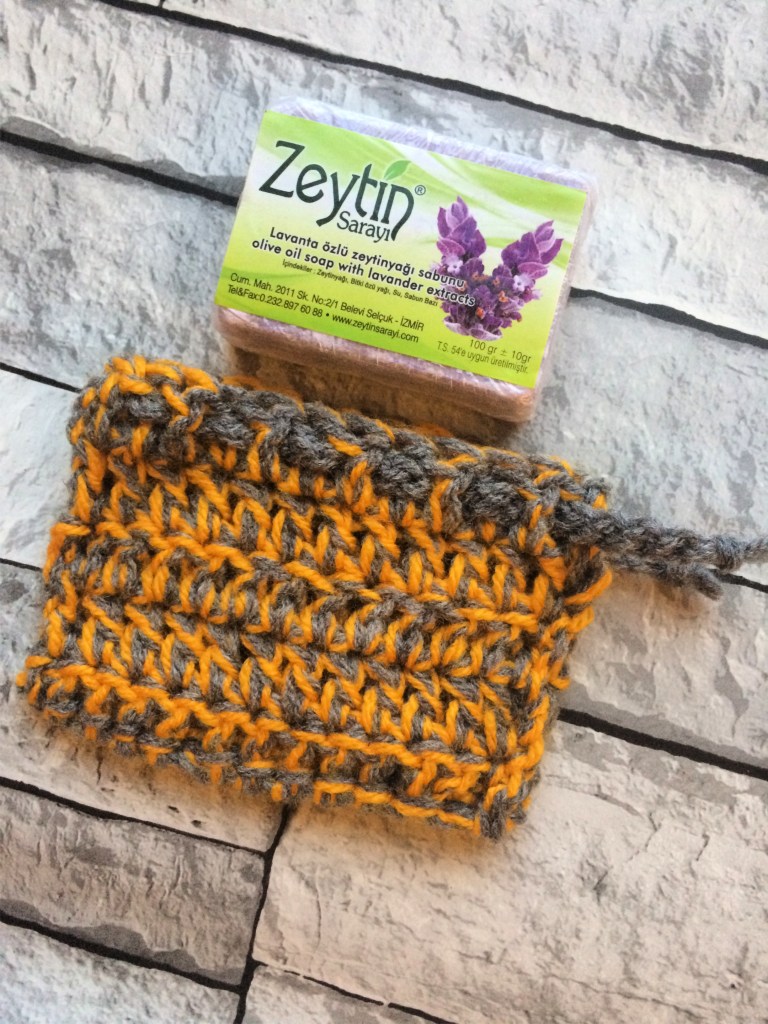
    Soap Bag

    Main:

    1. with two strands DK yarn held together, ch14, dc in 3rd ch from hook and across (12)
    2. ch2, turn, dc in st at base of ch and across (12)
    3. repeat row 2 eight times or until work measures 7″
    4. fold in half along long edge then work slst down one side, across the bottom and up the other side to make a bag
    5. bind off and weave in ends

    Tie:

    1. with one strand DK, ch50, slst in 2nd ch from hook and across
    2. bind off and weave in ends
    3. weave through the top row on the soap bag and knot each end
    4. add soap and pull tie tight to close

    I hope you enjoyed making this crochet bath set. I would love to see any sets you make using this pattern. Feel free to tag me on social media (@adeleuyancrochet) so I can see them! Or why not join our Facebook group to show off your creations. Happy crocheting.

    Processing…
    Success! You're on the list.