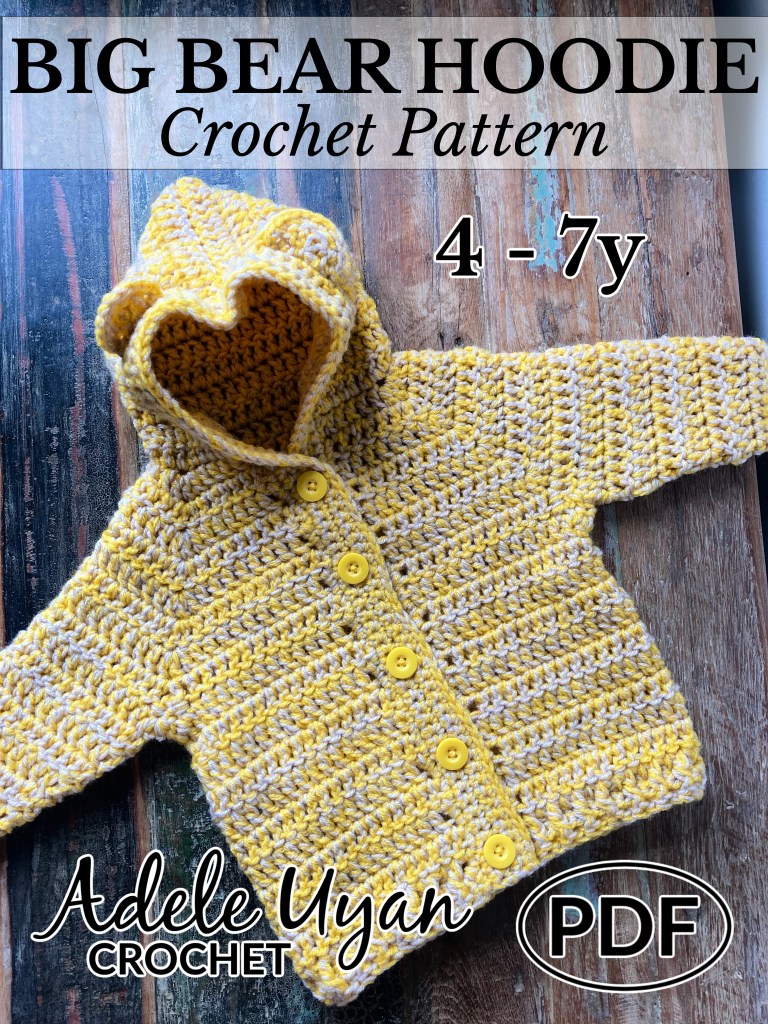
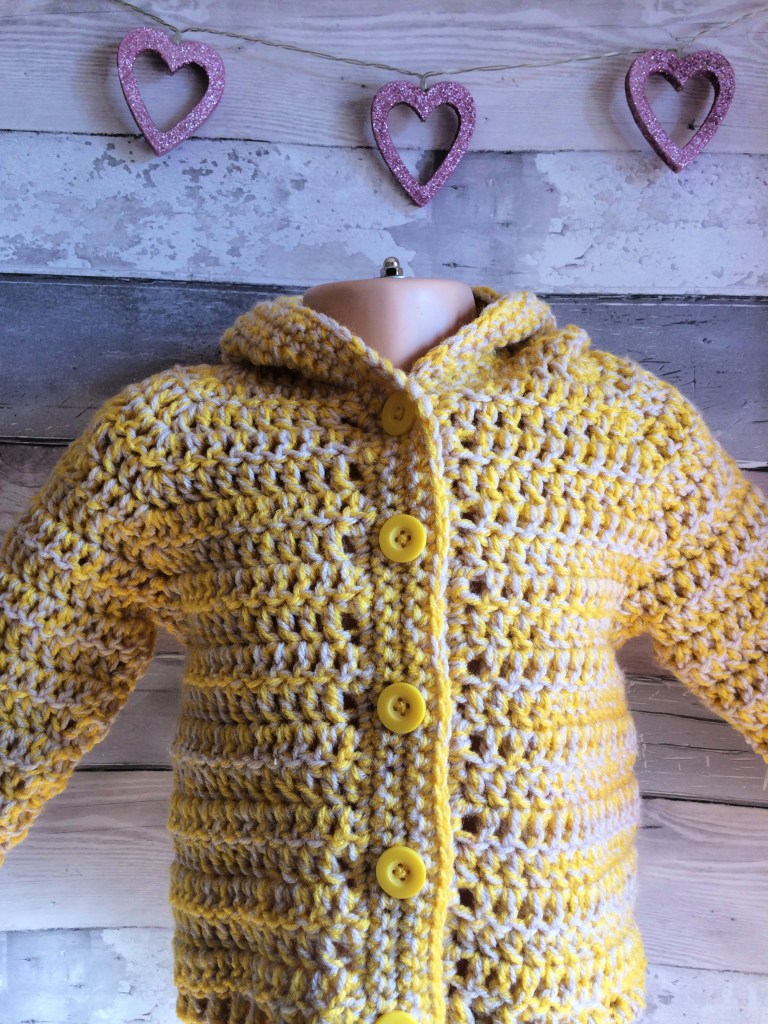
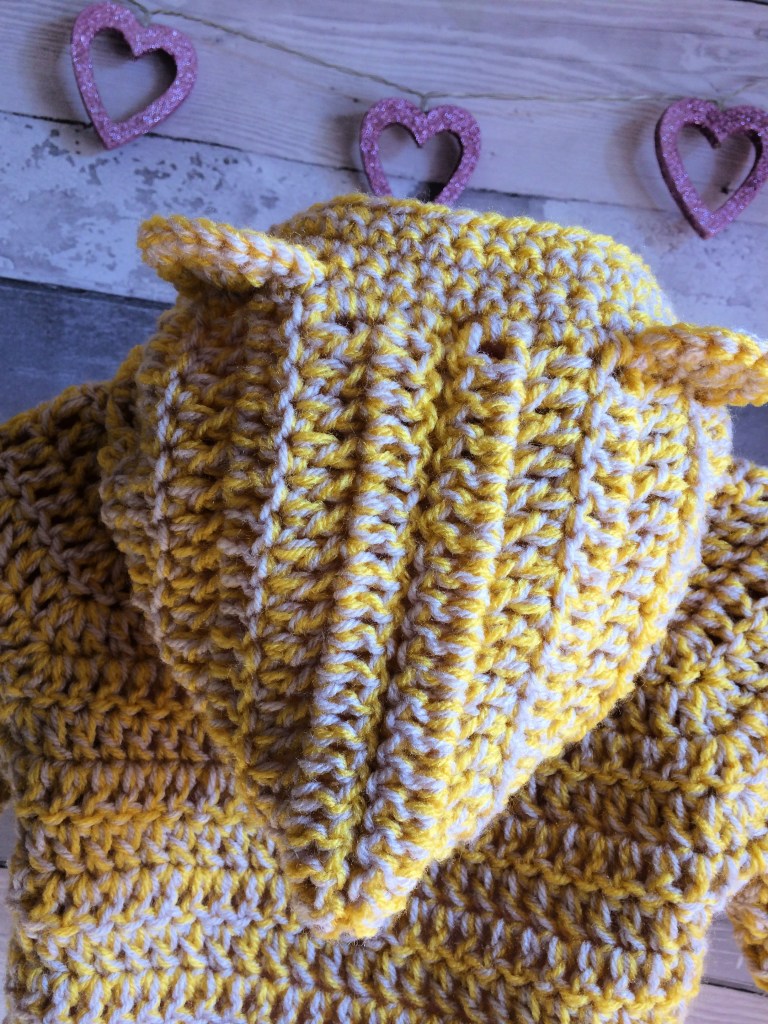
With this pattern, you will learn how to make big bear hoodies in sizes 4-5y, 5-6y and 6-7y, to fit chest sizes of approximately 23”-25″.
The pattern is written in English, uses American terminology and features the single crochet stitch, double crochet stitch, front post double crochet stitch and back post double crochet stitch. Basic knowledge of crochet is assumed, however the pattern is suitable for beginners and instructions are given for some stitches.
To make this pattern, you will need up to 550g double knit (number 3/light worsted) yarn, a tape measure, a pair of scissors, five buttons and a yarn needle. You will need 5mm, 6mm and 7mm crochet hooks.
You can find the big bear hooded cardigan pattern in my Etsy shop, alongside my other PDF patterns. Feel free to join us in my Facebook group to see more pictures, get feedback and ask any questions you may have.
Processing…
Success! You're on the list.
Whoops! There was an error and we couldn't process your subscription. Please reload the page and try again.
Am I the only one who gets absolutely freezing in the slightest bit of cold weather and really needs something to keep me as warm as possible outside? I made this hat to help keep my family toasty and warm this winter, and it is lovely and thick and cosy so it really does keep those little (and big) ears warm. It’s an added bonus that the hat can be made different colours on the inside and the outside, giving two different looks in one hat.
The reversible beanie hat pattern is sized to fit newborn to adult, and is made using double knit yarn. To make this pattern, you will need between 50g and 100g double knit yarn, a tape measure, a pair of scissors and a yarn needle. Each size uses a different crochet hook, varying from 3.5mm to 4.5mm. If you would like to know which crochet hook is required for your particular size, feel free to message me and I will check for you before you buy.
This pattern is written using American terminology, and is suitable for beginners. Basic knowledge of crochet is expected, but photo instructions are provided for some stitches.
This pattern is now available in my Etsy shop, along with my other PDF crochet patterns and a few things I have handmade to sell. I would love for you to join us in my Facebook group to see more pictures, get feedback and ask any questions you may have.
Processing…
Success! You're on the list.
Whoops! There was an error and we couldn't process your subscription. Please reload the page and try again.
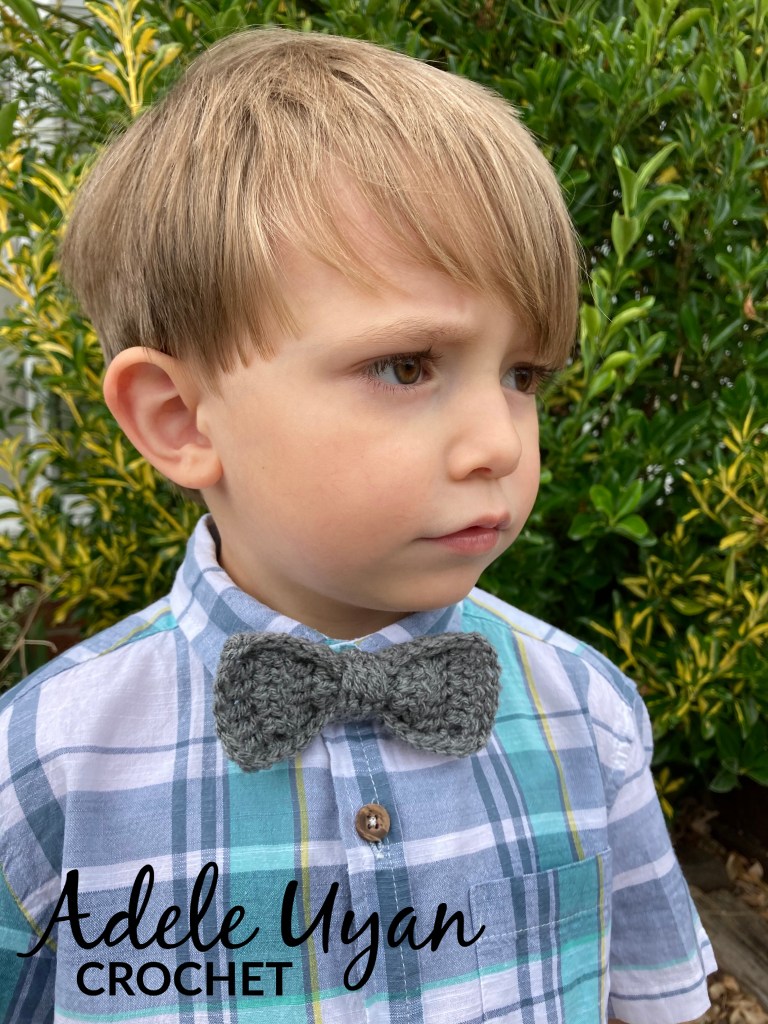
We have a family party coming up this month and I wanted to make my son a little bow tie to wear over his shirt, to make him look a little smarter. I adore the bow tie and shirt trend, especially on children, so this is definitely not a new look for him. He has several different colours of bow tie but none that matched with the specific shirt I wanted him to wear. As I was making the bow tie, I decided to write the pattern down for you all so you could make your own if you wanted to.
To make your own child’s crochet bow tie, you will need a 4mm hook, double knit or light worsted yarn and a small button. This size of bow tie fits my 4 year old son well. It can easily be made to fit smaller or larger children, by adding or removing rows from the neck strap. This pattern is written using American terminology.
Child’s Bow Tie (Free Crochet Pattern)
Bow:
1. ch8, dc in 3rd chain from hook and across (6)
2-16. ch2, turn, dc in same stitch as chain and across (6)
17. ch1, fold in half, sc around, working through both edges to close, join with slst in top of 1st sc, bind off and weave in ends
Neck Strap:
1. ch5, dc in 3rd chain from hook and across (3)
2-26. ch2, turn, dc in same stitch as chain and across (3)
27. ch1, turn, sc in same stitch as chain, ch1, skip 1 stitch, sc in last stitch
28. ch1, turn, sc in same stitch as chain, sc in chain space, sc in last stitch, bind off and weave in ends (3)
Bow Centre:
1. ch5, dc in 3rd chain from hook and across (3)
2-4. ch2, turn, dc in same stitch as chain and across (3)
5. bind off, leaving a long tail to join
Finishing:
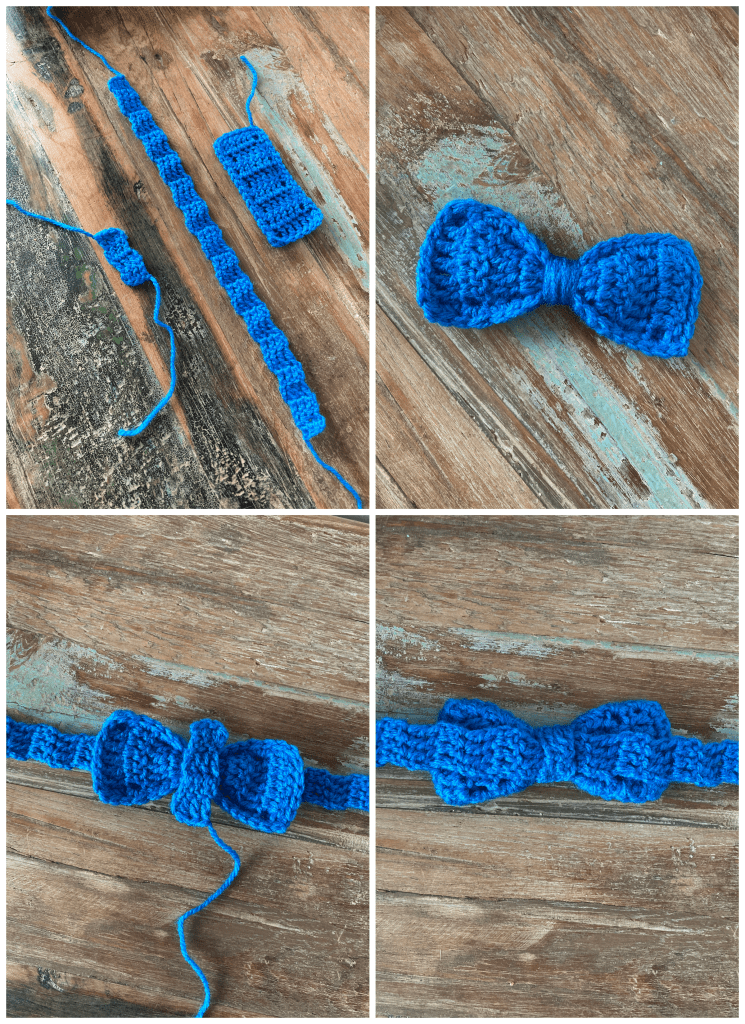
1. take the main bow piece and gather the very centre with a piece of matching yarn, tie it off tightly to give the bow a nice shape and weave the ends in
2. lay the gathered bow on top of the neck strap and cover with the bow centre, stitch the two pieces of bow centre together, using the long tail that you left, with the bow and neck strap neatly inside, bind off and weave in ends
3. attach a small button to the end of the neck strap without the buttonhole
I hope you like this free pattern. Please do let me know if you do make one of your own so I can see it. You can tag me on social media (@adeleuyancrochet) or why not join our Facebook group so we can all see!
Processing…
Success! You're on the list.
Whoops! There was an error and we couldn't process your subscription. Please reload the page and try again.
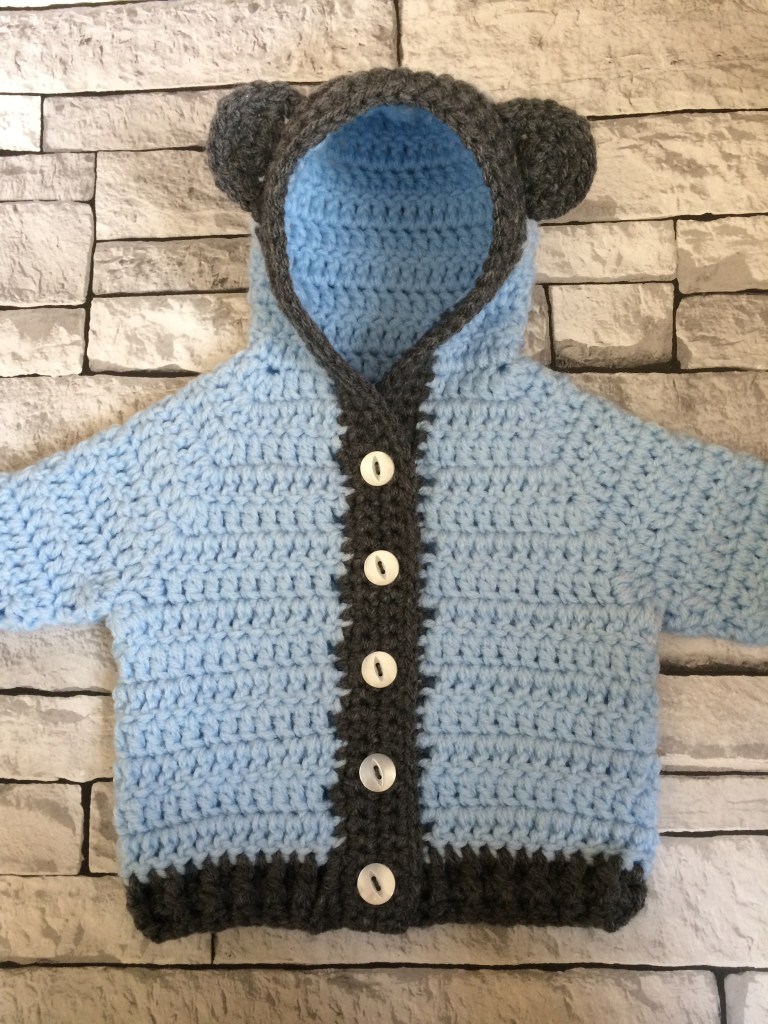
I released my Baby Bear Hoodie pattern a few months ago, and since then I have been working on a toddler version of that pattern. As I am a perfectionist and currently test all of my patterns myself, this has taken me longer than I would care to admit. I have had quite a few requests for larger sizes and I am delighted to now be able to say that I have finally finished the Toddler Bear Hoodie pattern! This pattern is for sizes 1-2y, 2-3y and 3-4y, or from around 20″-22″ chest. The pattern has been made with around 5″ of ease included, to allow for layering. The hoodie can be made without the bear ears, but I think they add an extra touch of cute.
The hoodie is made using two strands of double knit yarn held together throughout, with 5mm and 6mm crochet hooks. The pattern is easy to follow and is suitable for beginners, although basic knowledge of crochet is needed. I have written the pattern using US terminology.
You can find the toddler hoodie pattern in my Etsy shop, alongside my other PDF patterns and a few things I have crocheted and are ready made for sale. The baby sized version of this pattern is available here, and for a combined pattern to fit from newborn to 4 years, click here. Feel free to join us in my Facebook group to see more pictures, get feedback and ask any questions you may have.
Processing…
Success! You're on the list.
Whoops! There was an error and we couldn't process your subscription. Please reload the page and try again.
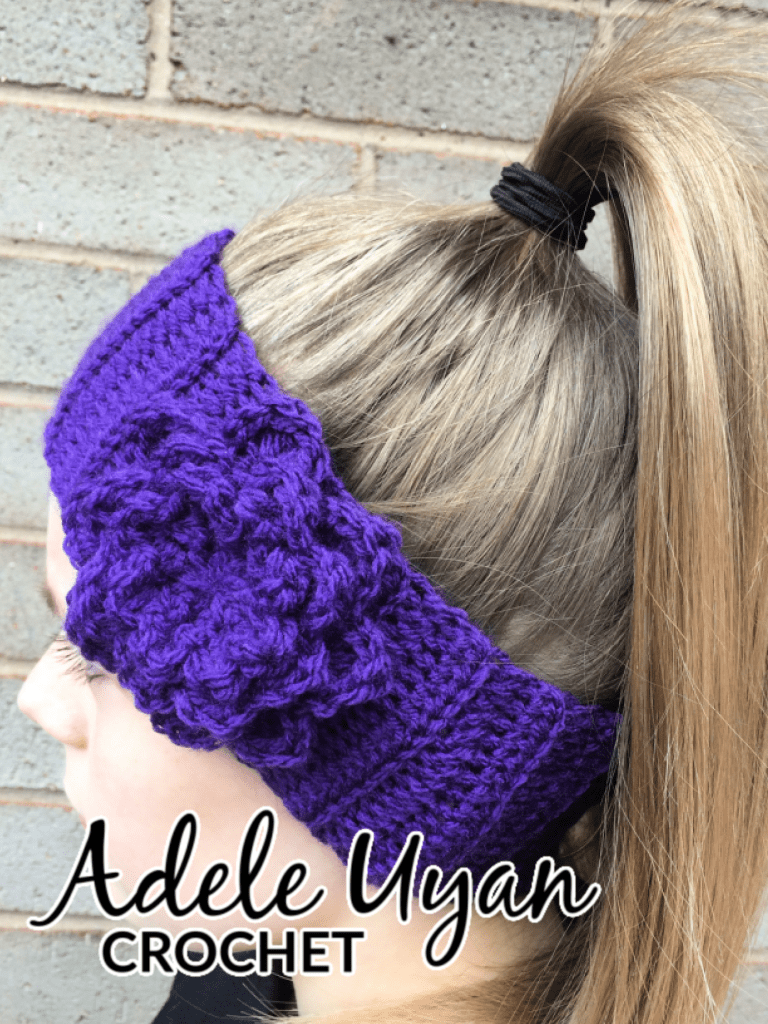
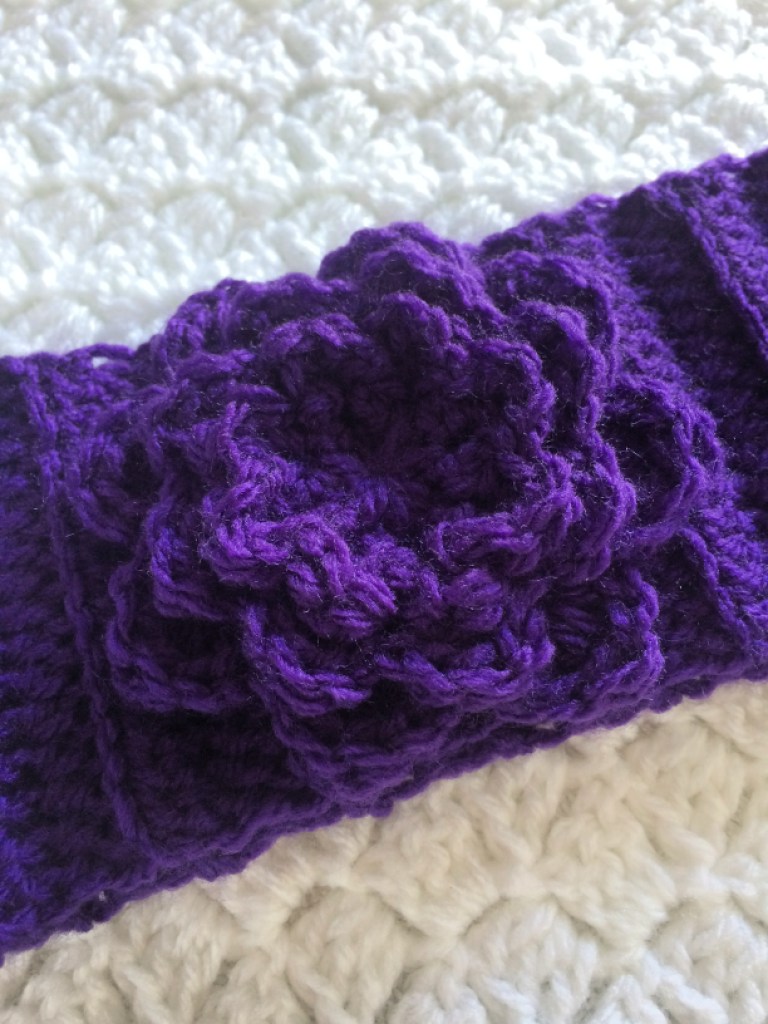
This is another one of those patterns that I have made many of over the years. Headband earwarmers work up really quickly and look very cute. I think the thing I love the most is that they can be worn over a ponytail. That is something I have struggled with in the past, keeping the girls ears warm when they want to wear their hair up. They don’t like wearing a hat over their ponytail and to be fair, it does look pretty uncomfortable so I can see why they wouldn’t like it. This was our compromise. They get their ponytails and I get to cover their ears so I know they are warm ❤
To make your own headband earwarmer, you will need a 5mm crochet hook and double knit yarn in the colour of your choice. I let my girls choose their favourite colours, so I know there will be no fighting over wearing them. You will also need a tape measure, a pair of scissors and a yarn needle.
This pattern should fit an age 6-10 years or up to about a 21″ head. The finished earwarmer should measure approximately 17.25″ in unstretched length and 3.25″ width.
Crochet Headband Earwarmer (Free Pattern)
Main:
1. ch17, hdc in 3rd chain from hook and across (15)
2-41. ch2, working in back loops only, hdc in stitch at base of chain and each stitch across (15)
42. join the two short ends together with slip stitch, to form a tube
43. bind off and weave in all ends
Flower:
1. make a magic loop, ch2, work 16 dcs into loop, join with slst in top of 1st dc, pull centre tail to tighten (16)
2. ch1, do not turn, sc in same st, *ch4, sk 1st, sc in next st*, rep *-* until last st, ch4, join with slst in top of 1st sc
3. ch1, do not turn, *work sc, hdc, dc, trc, dc, hdc, sc, all into one chain space*, rep *-* around, join with a slst in top of 1st sc, bind off
4. rejoin yarn in one of the skipped stitches on round 2, ch1, sc in same st, *ch3, sc in next skipped stitch*, rep from *-* around, ch3, join with slst in top of 1st sc
5. ch1, do not turn, *work sc, hdc, dc, hdc, sc, all into one chain space*, rep *-* around, join with slst in top of 1st sc, bind off
6. make a magic loop, ch1, *sc into loop, ch4*, rep *-* seven more times, join with slst in top of 1st sc
7. ch1, do not turn, *work sc, hdc, dc, hdc, sc, all into one chain space*, rep *-* around, join with a slst in top of 1st sc, bind off
8. using the centre tail of the smaller flower, layer and stitch the small flower on top of the larger flower
9. stitch the flower onto the headband earwarmer and weave in all ends
I hope you find this free pattern useful and make a headband earwarmer of your own. Please let me know if you do make one so I can see your amazing work. You can tag me on social media (@adeleuyancrochet) or better still why not join our Facebook group so we can all see!
Processing…
Success! You're on the list.
Whoops! There was an error and we couldn't process your subscription. Please reload the page and try again.
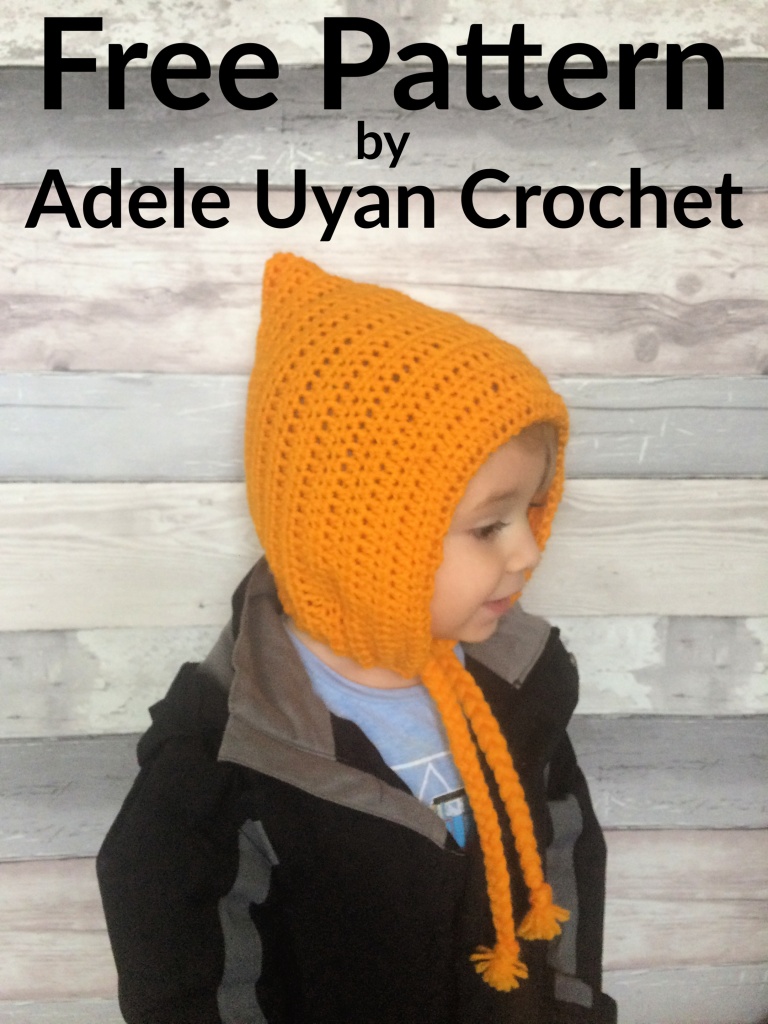
Is it even possible for a child to wear a pixie hat and not look the cutest they’ve ever looked? This pixie hat will keep little ears warm and can be tied to make sure it won’t fall off (or be pulled off).
This pattern should be suitable for beginners.
This pattern was originally for 3-10 years, but I decided to add instructions to make the hat to fit 0-1 years aswell. You can easily size up or down as needed to get the look and fit you want.
I crochet quite tightly so you may need to play around with hook sizes to get the required hat size. My finished 0-1y hat is 6.5” wide and 7.5” tall and the finished 3-10y hat is 8.5″ wide and 9″ tall. That means you need a starting rectangle of around 14” x 6.5” for 0-1 years and 17″ x 8.5″ for 3-10 years.
To make your own braided pixie hat, you will need double knit yarn in the colour of your choice. You will also need a 4mm (0-1y) or 6mm (3-10y) crochet hook, a tape measure, a pair of scissors and a yarn needle.
Braided Pixie Hat (Free Crochet Pattern)
Main:
1. ch62, hdc in 3rd ch from hook and across (60)
2-21. ch2, turn, hdc in st at base of ch and across (60)
22. fold in half lengthwise to make a bonnet shape, slip stitch the back together then bind off and turn the seam to the inside of the hat
Neck:
1. with wrong side facing, join yarn in bottom corner st, ch1, sc in same st and each row across (42)
2. ch1, turn, *sc in next 2sts, sc2tog*, repeat from *-* across to last 2sts, sc in last 2sts (32)
3-4. ch1, turn, sc across (32)
5. do not ch or turn, work a second sc in corner st, *sc in next st, sc2tog*, repeat from *-* across front to end, sc in same space as first st on neck, join with slst to first st on neck, bind off and weave in all ends
Braids:
cut 12 lengths of yarn measuring 25-30″ each
find the corner of the hat, at the front, and thread the 12 lengths through, hanging half of the length either side of the hole, so you end up with 24 strands of yarn
braid the strands together in groups of 8
tie off with a knot at the bottom and trim the ends
repeat on the other side of the hat
I hope you enjoyed making this cute crochet pixie hat. I would love to see any hats you make using this pattern. Feel free to tag me on social media (@adeleuyancrochet) so I can see them! Or why not join our Facebook group to show off your creations. Happy crocheting.
Processing…
Success! You're on the list.
Whoops! There was an error and we couldn't process your subscription. Please reload the page and try again.